Monthly Tasks
Driving Wheel Wear Check
Press the emergency button to make work on the robot safe.
Measure the thickness of the rubber of the SOTO’s drive wheels with a caliper. The two wheels are located at the front right and rear left of the robot. If the thickness of the rubber is below 3.5 mm, contact support. The wheel has reached the maximum abrasion.
Release the emergency button.
Check for Blocked Rollers
Press the emergency button to make work on the robot safe.
Check the rollers in the backpack shelf for ease of movement. Move your hand over the rollers for each backpack compartment. If some rollers are blocked, contact support.
Release the emergency button.
Degreasing of Backpack Spindle
Change SOTO’s operating mode to “Manual Mode” through the robot icon on SOTO’s display.
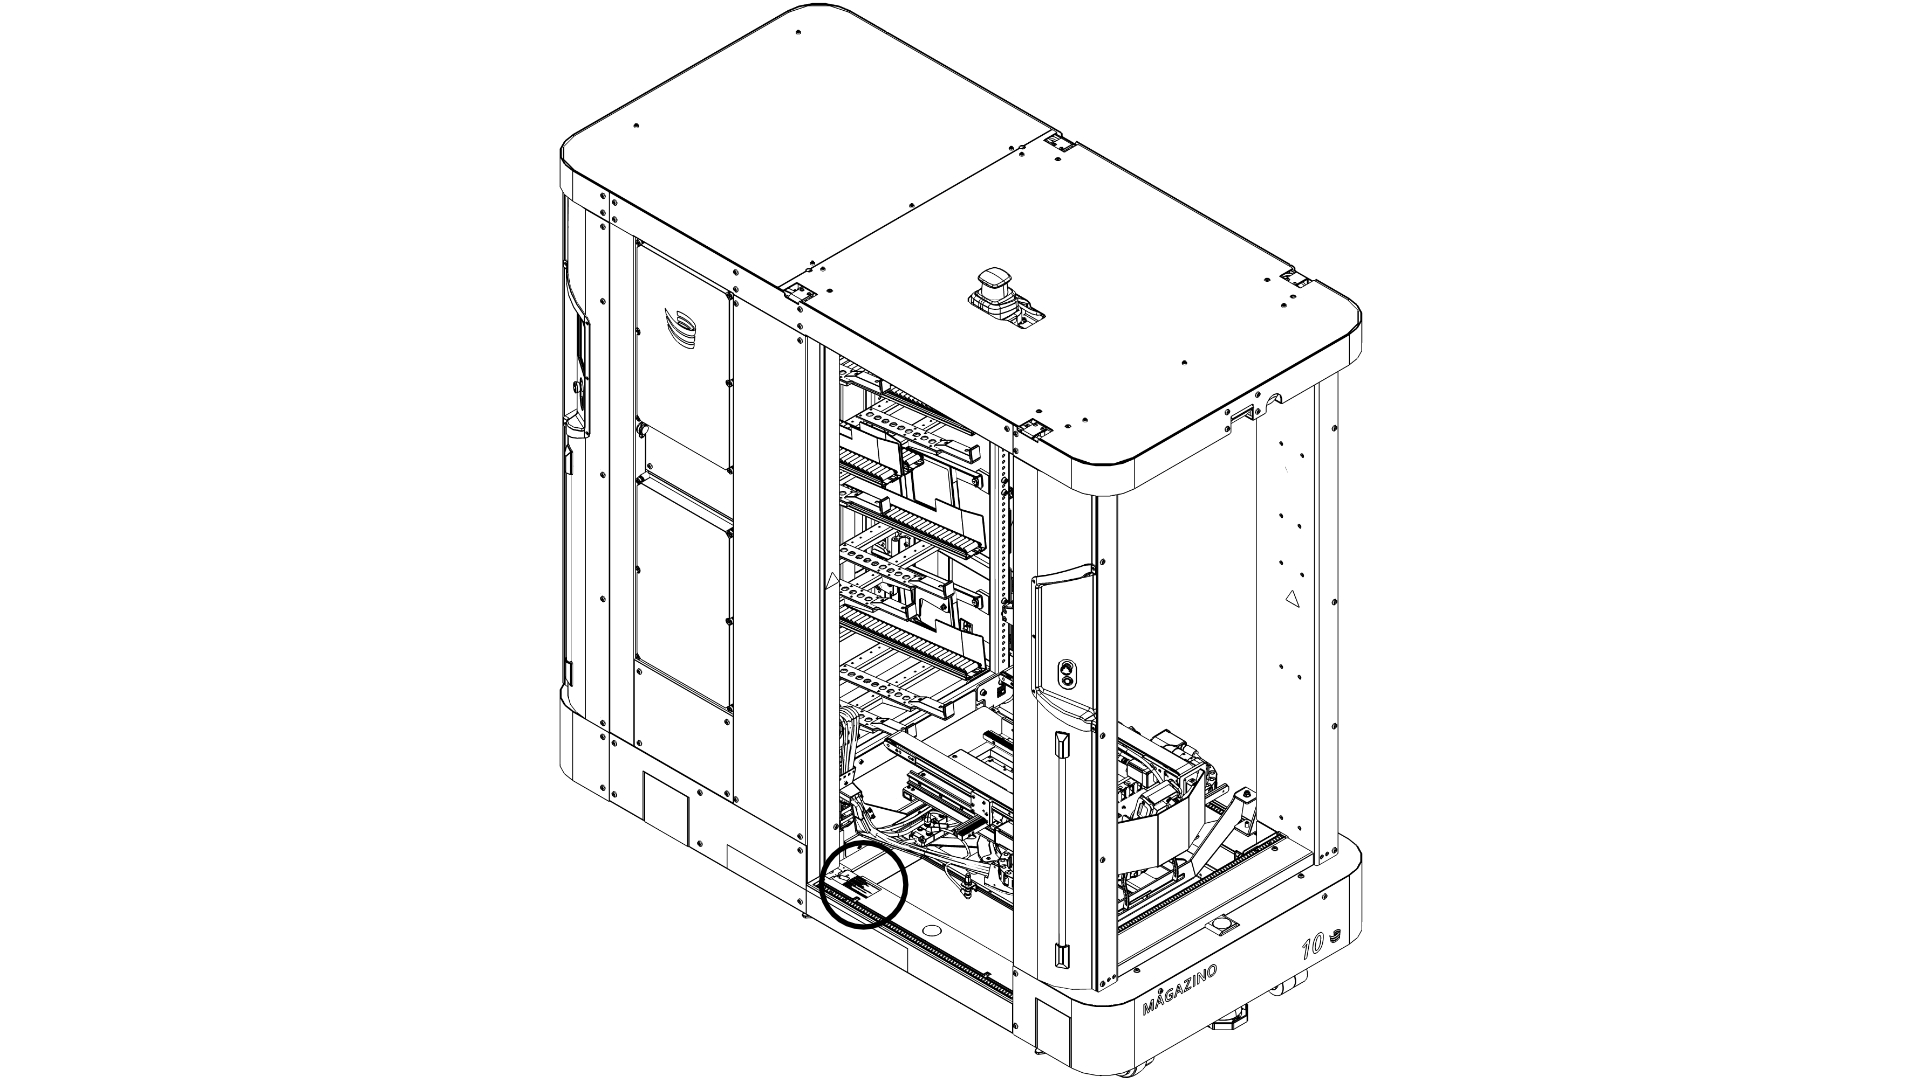
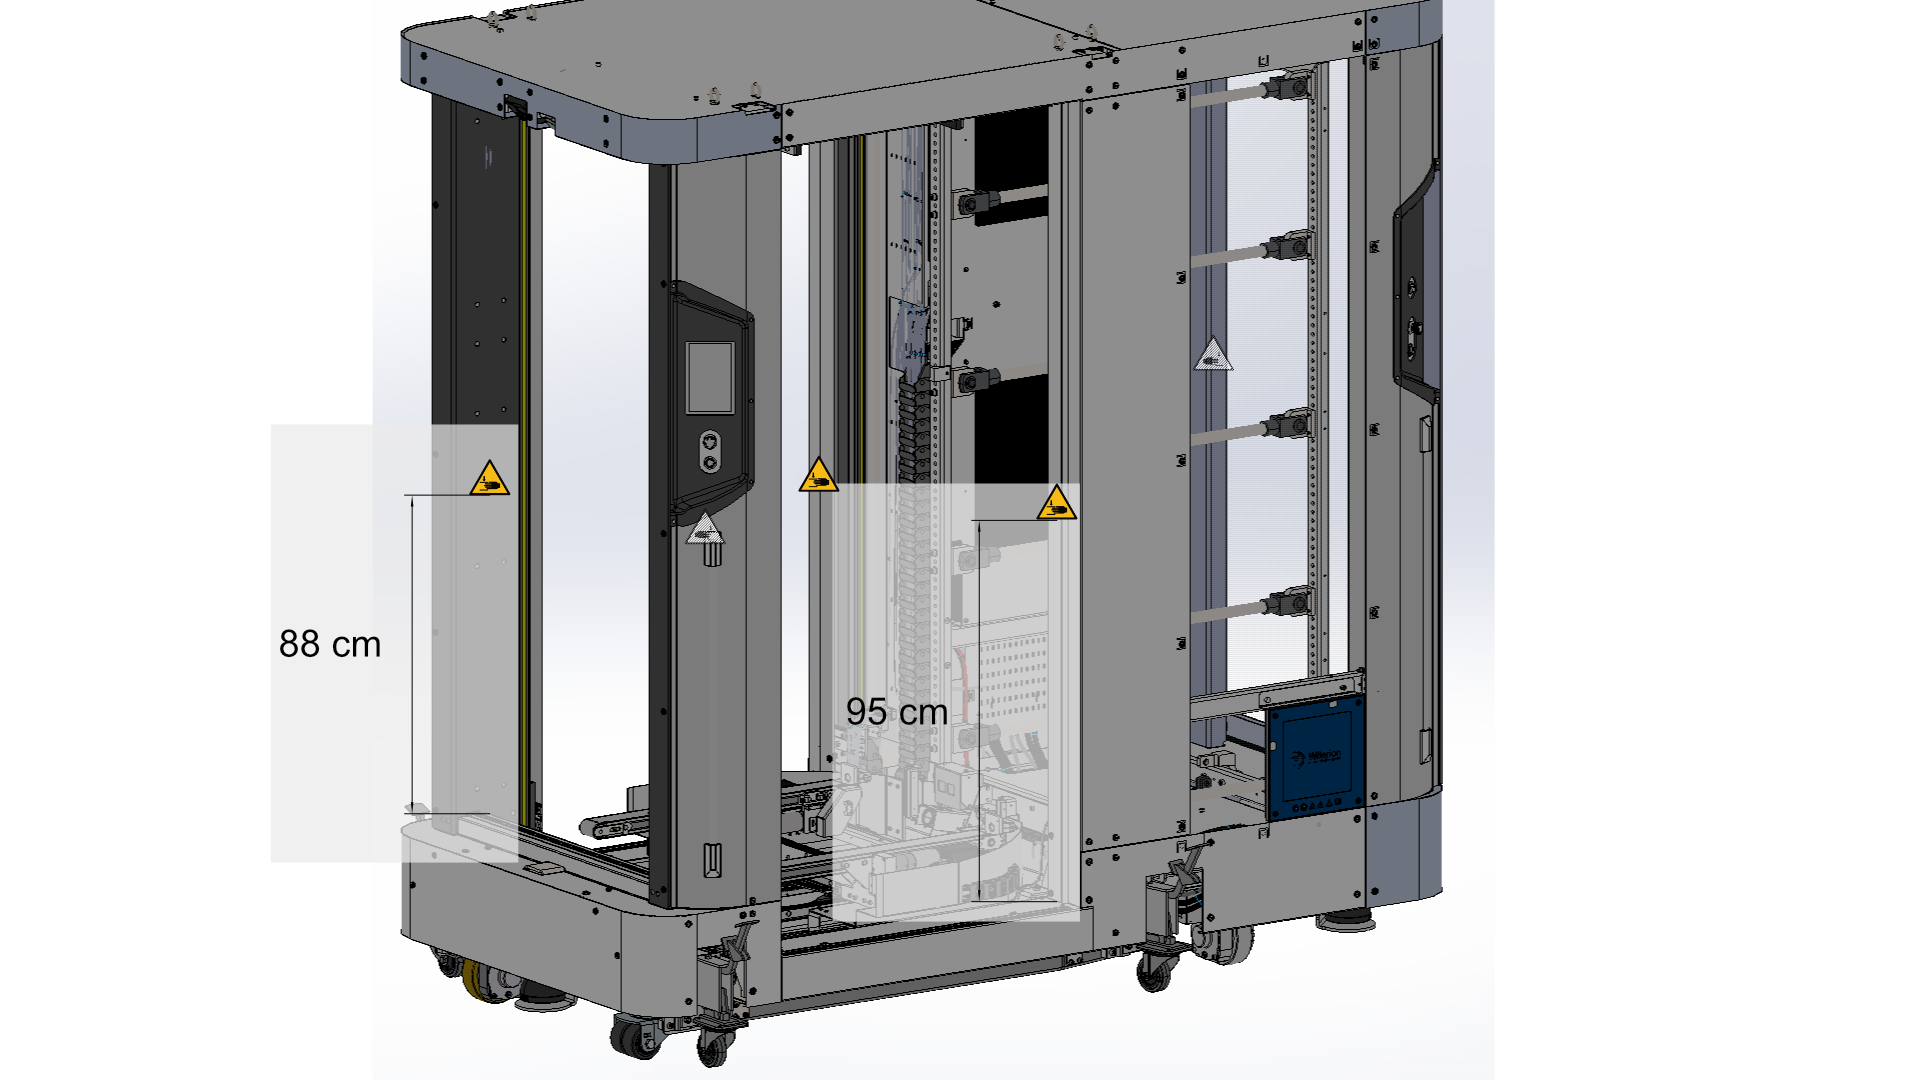
Tilt the backpack towards the front of the robot, using the “A” key of the controller. You can find the controller behind the bottom cover in the rear of the robot. The spindle should now be visible from the rear of the robot.
Press the emergency button to make work on the robot safe.
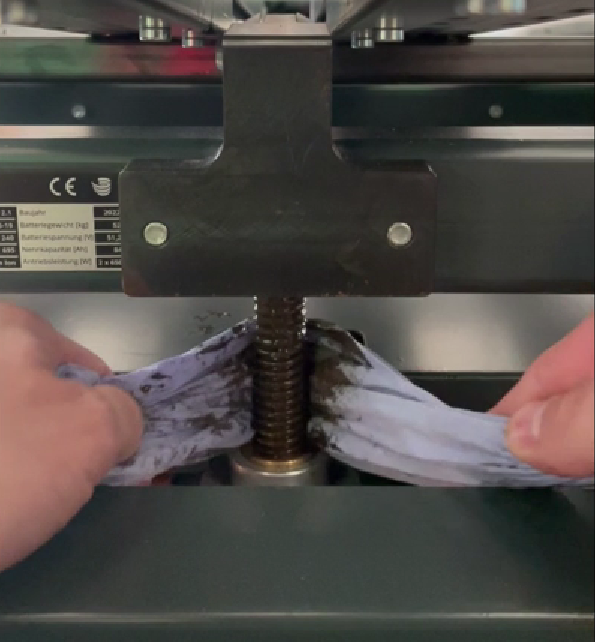
Use a paper towel to remove excessive grease from the spindle (see Figure below). Do NOT use any degreaser.
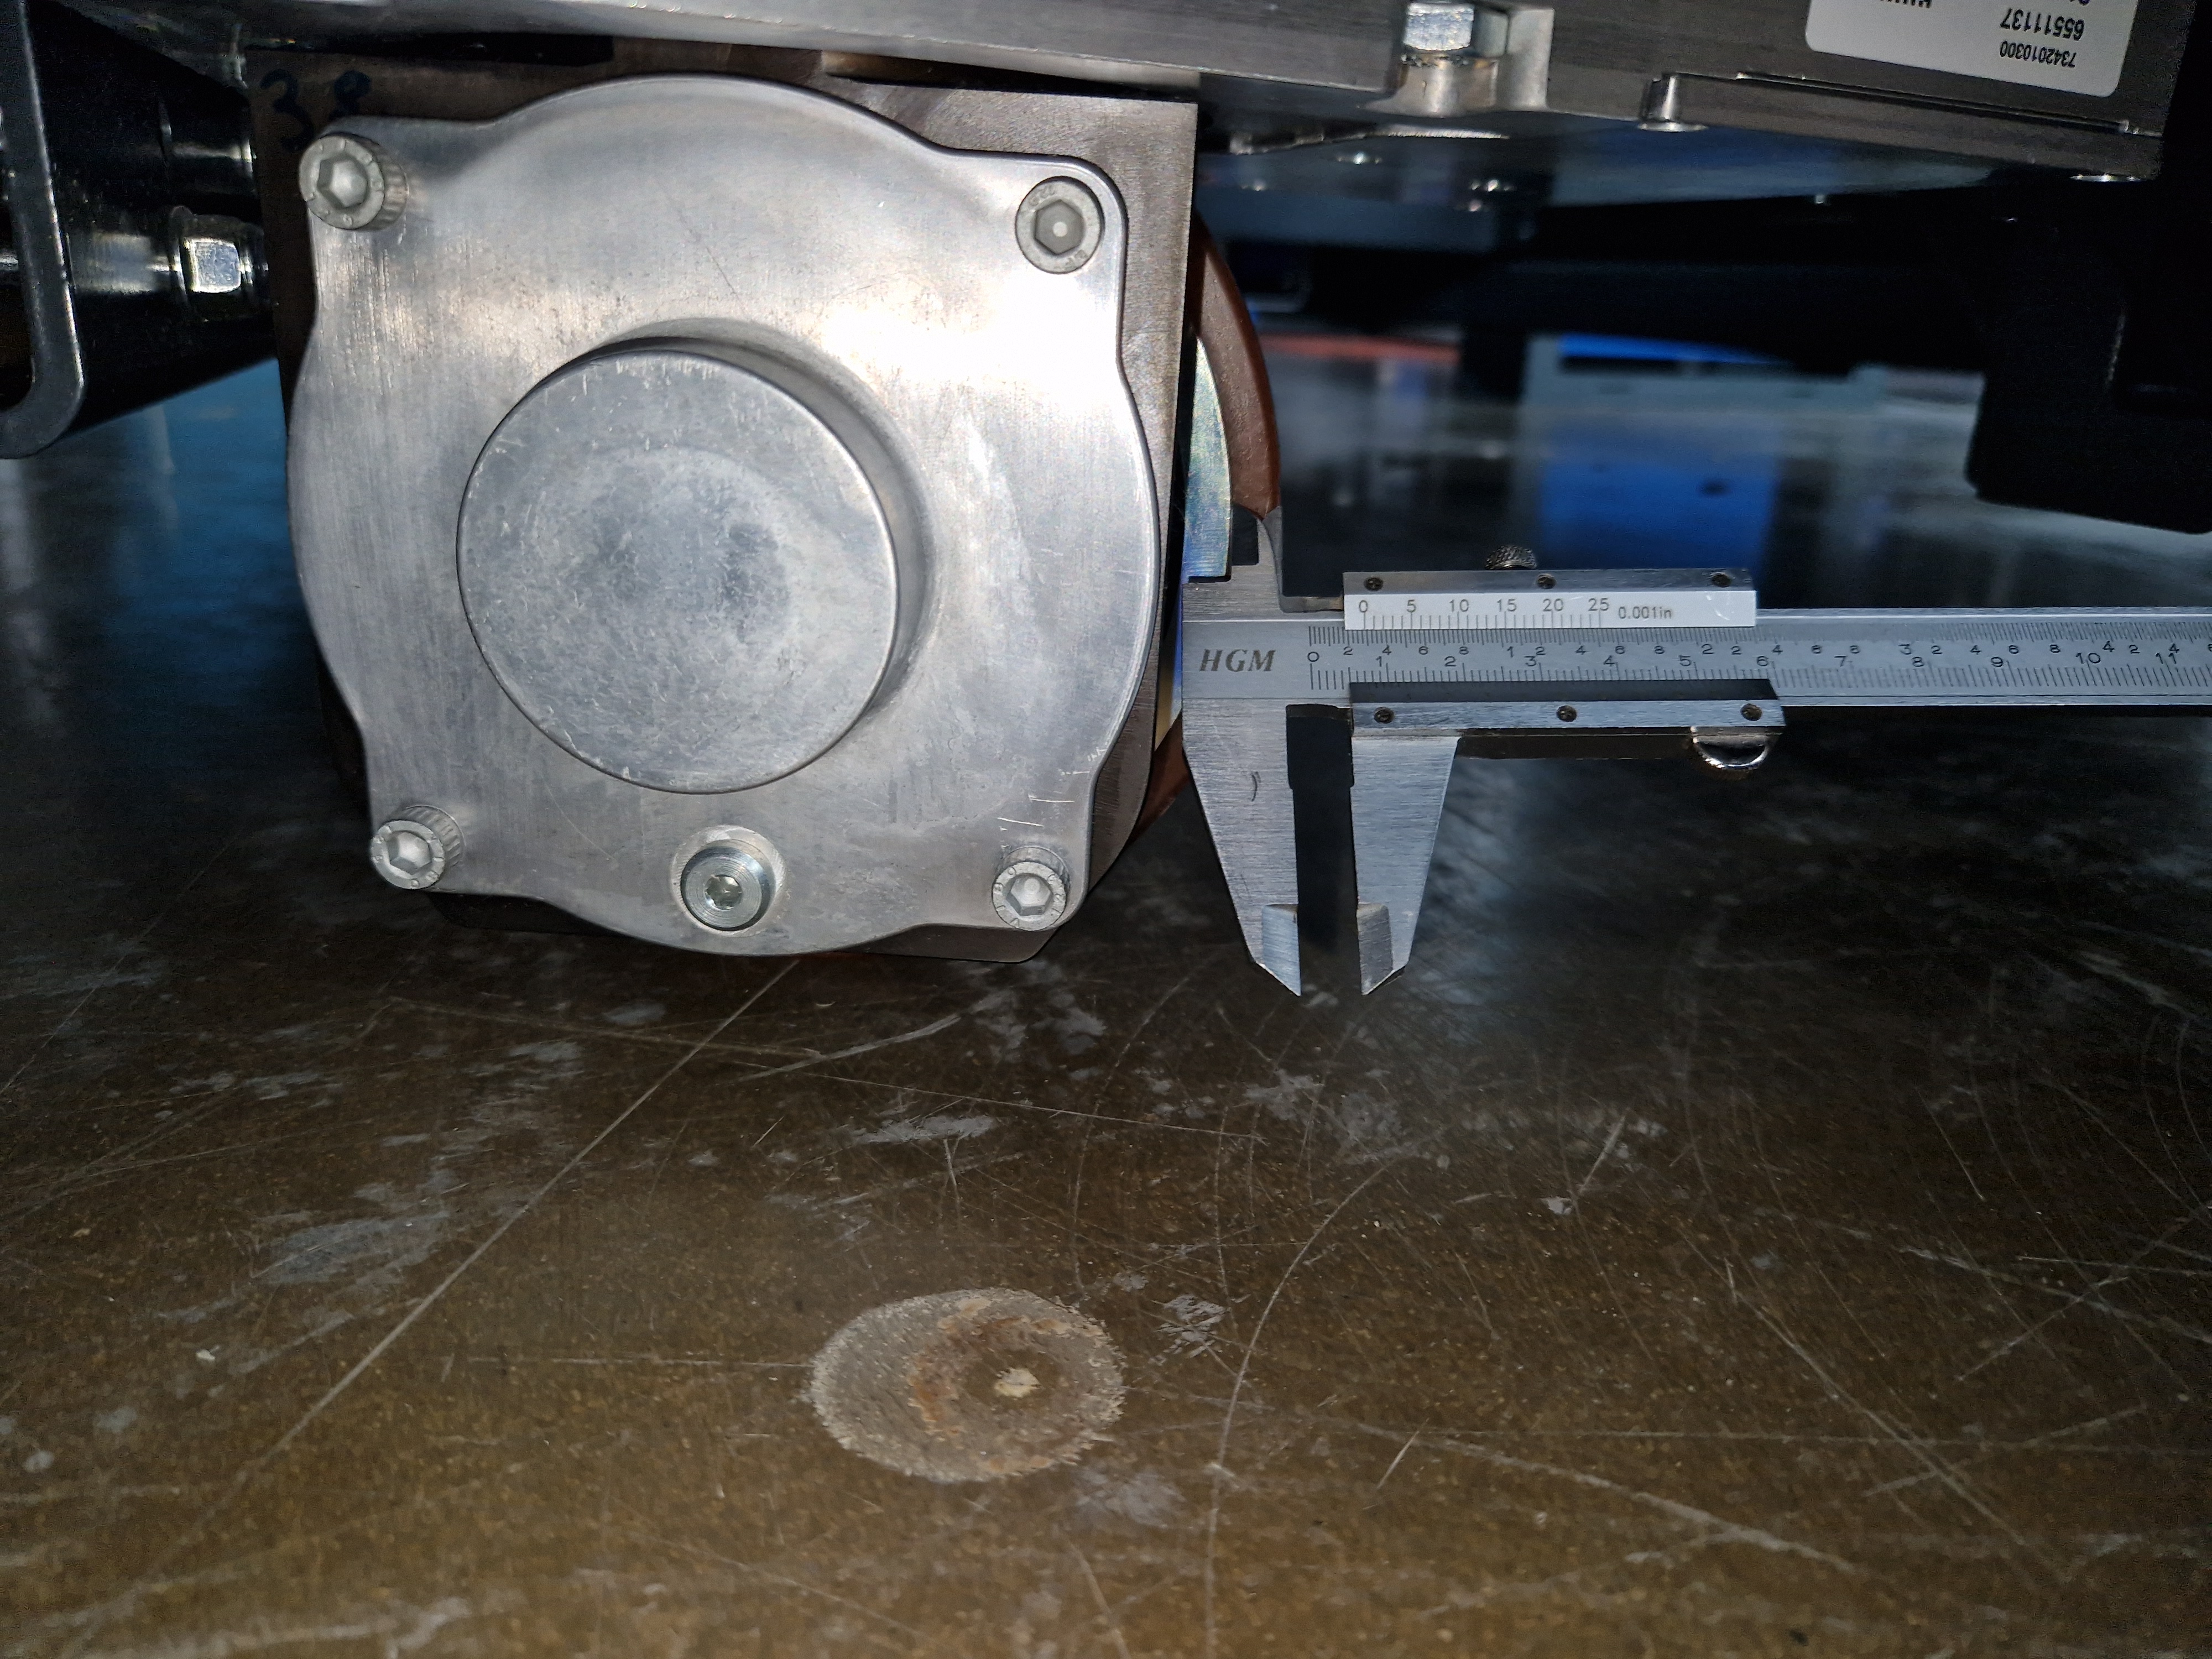
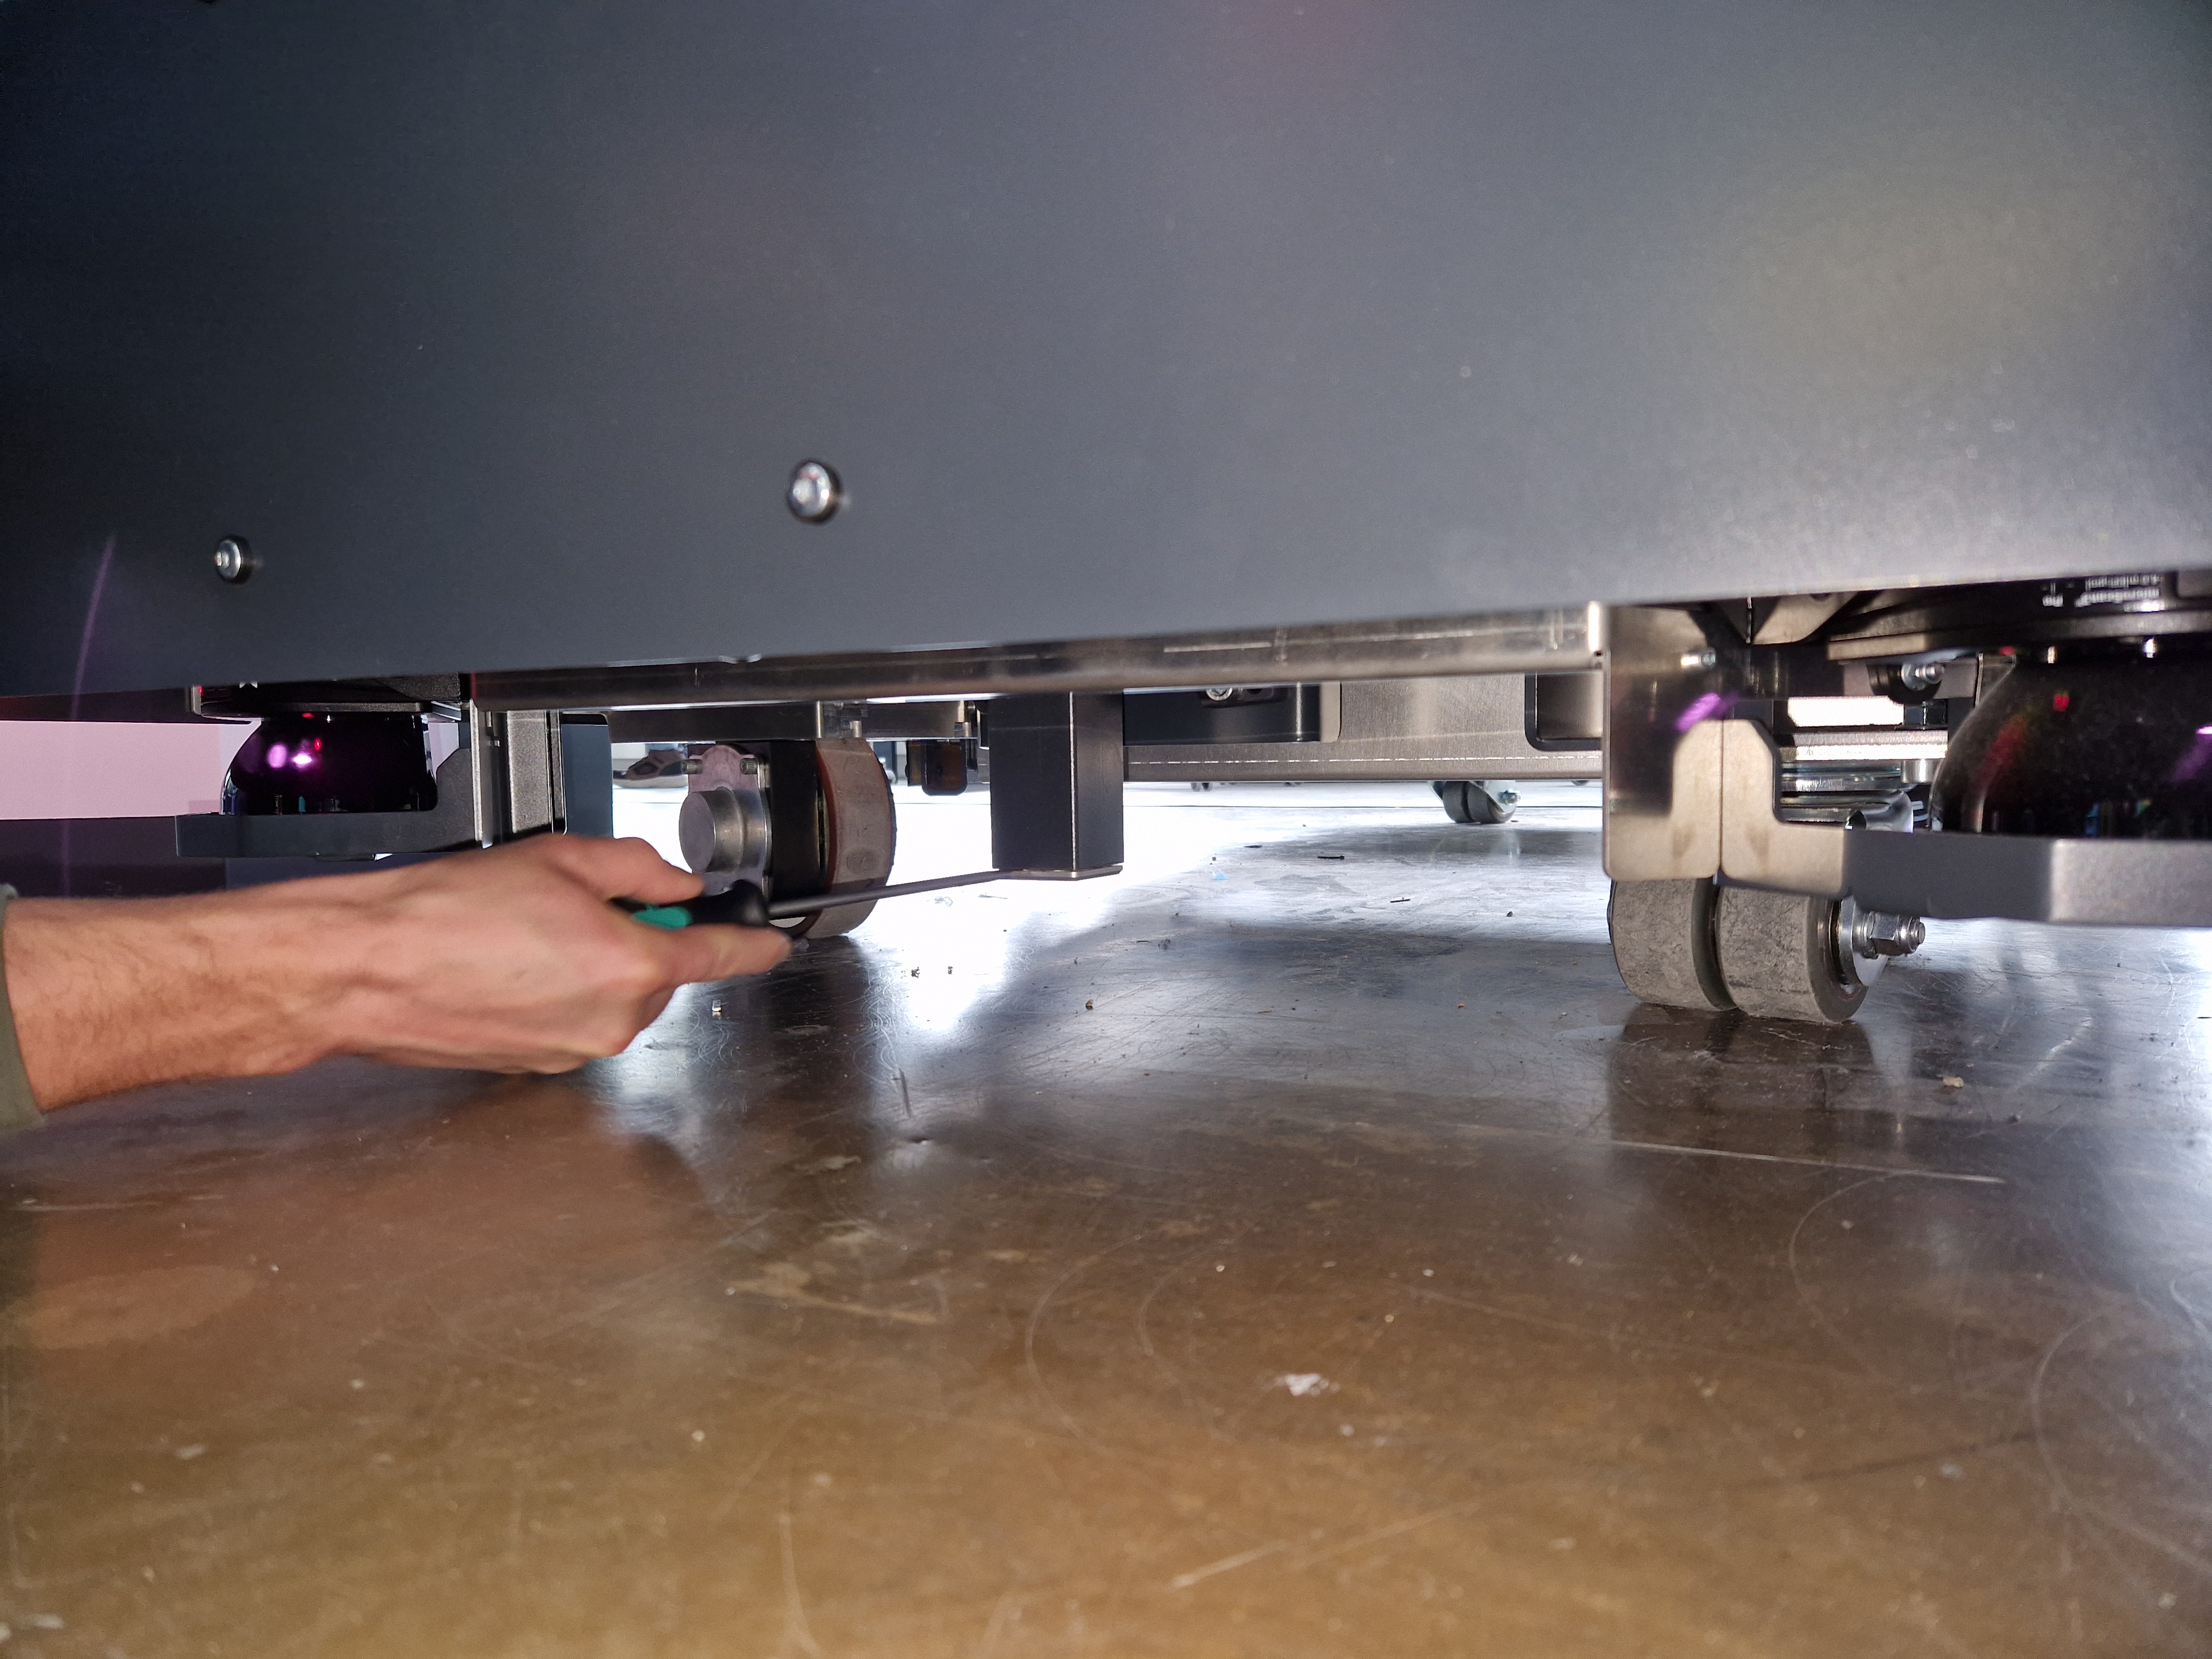
Underneath the robot (better access from the rear side), locate the ZIMM gear and remove its closing cap (see Figure below). The cap might be difficult to remove, since the gap between the metal tube and the aluminum cap is small. It is recommended to first use a small screwdriver to separate them, and then a large one to pull them apart.
Remove any residual grease from the cap.
Place the cap back in. The space between the cap and the floor is limited. Therefore, we recommend placing the cap by hand and use the floor as a pivoting point, together with a rubber hammer or a large screwdriver to push the cap up.
Release the emergency button.
Inspection of the gripper’s end stops
Check whether the gripper’s end stops work properly.
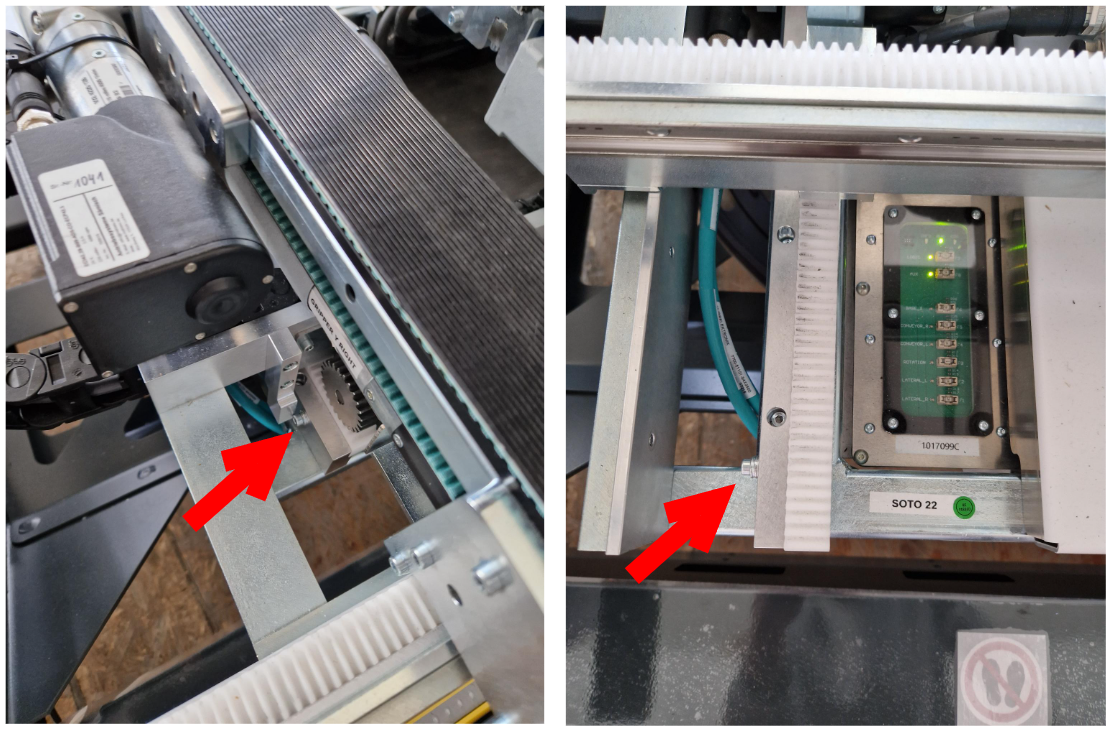
Visually inspect the gripper’s end stops in x-direction (one screw) for obvious damage.
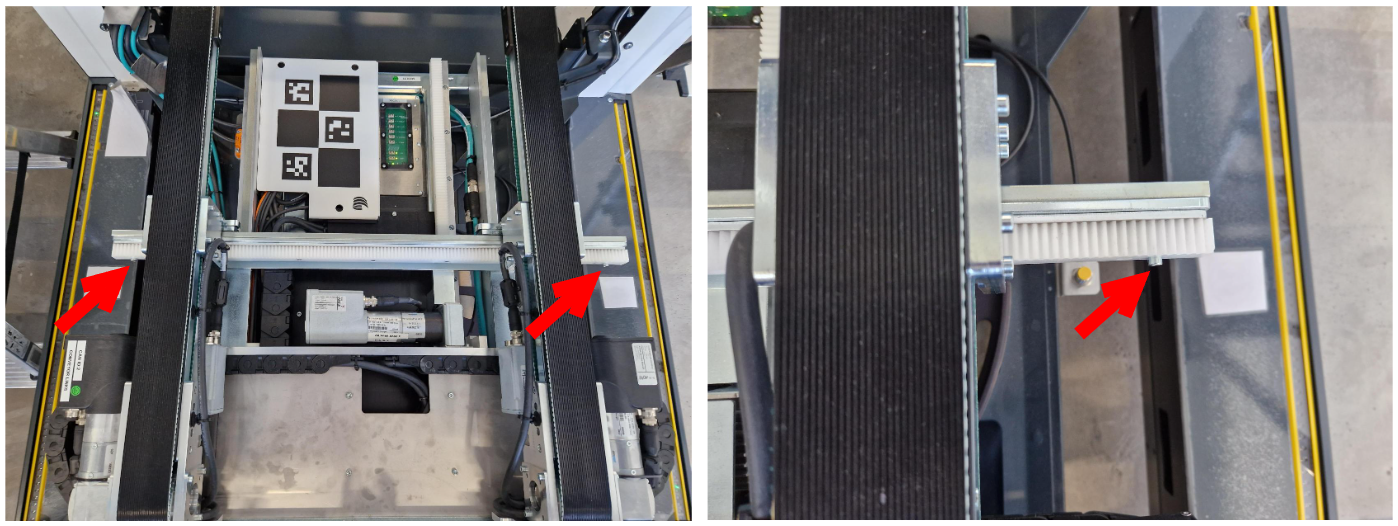
Visually inspect the gripper’s end stops (two screws) in y-direction for obvious damage
Move the conveyor belts all the way to the front and back in x-direction. They should be physically stopped by the end stops.
Move the conveyor belts all the way to the outside in y-direction. They should be physically stopped by the end stops.
In case of failure, please immediately contact support.
Warning Label Check
Visually check the warning labels on the robot for completeness and legibility.
Crushing hazard (6x)
“Do not step in/on” Stickers (4x, one at each opening)
Warning sticker for SOTO charging station adapter cable
Electricity warning sticker at charger door
Blue inductive charging plate sticker (on charging pads of each charging station and each robot)
Stickers at physical on-off switch (2x): “Shut down on display first.”
Camera warning symbol