
Operation
Automatic mode
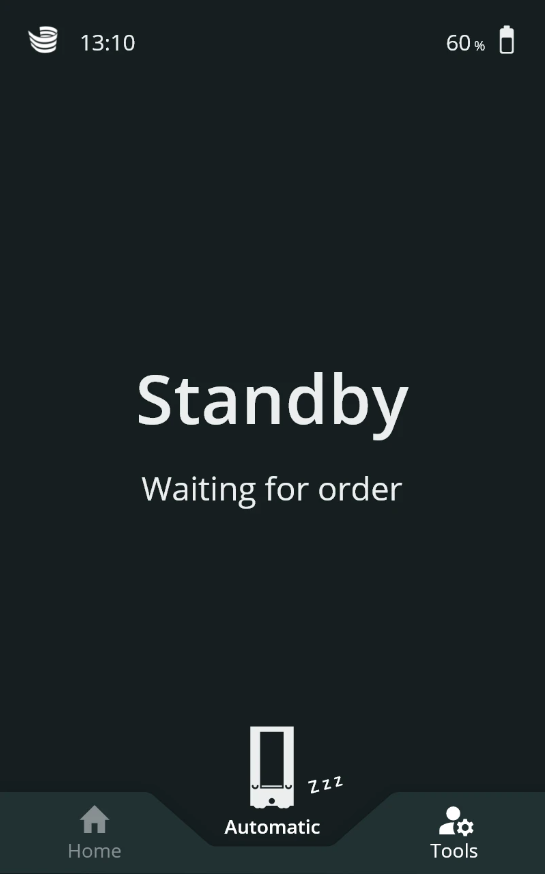
SOTO 2.1 is an autonomous robot and is mainly operating in automatic mode. The robot receives its orders independently via the already existing system and processes them. Intervention by trained personnel or a specialist is only necessary in the event of a fault.
Light signals in automatic mode
White light pulsating | White light flashing | One side white and the other red | Red light flashing |
|---|---|---|---|
| 
| 
| 
|
SOTO is on standby and waits for orders. | The path is blocked. | SOTO indicates the direction of travel with the white light. | SOTO has an error. |
One side white and the other flashes yellow | Yellow light flashing | Green light pulsating | Green light constant |
|---|---|---|---|
|
| 
|
|
SOTO indicates a turn. | SOTO interacts with a handover station. The light curtain facing the handover station is muted. | SOTO is charging. | SOTO is fully charged. |
Acoustic signals in automatic mode
Buzzer: The buzzer gives a signal if a protective field violation of the smallest field occurs on the virtual bumper or any light curtain is violated, while no emergency stop button is pressed.
Loudspeaker: The robot has a loudspeaker that is currently not in use.
Manual operation
The robot can be controlled manually in two ways. A controller can be used to move the robot. When using a controller, the safety control remains activated at all times.
If the robot is disabled, jacking rollers can be attached to allow the robot to be pushed.
Operation with a controller
.png?inst-v=f4298025-0332-4f6d-9973-f1558a9c6c26) | Danger! Danger of accident! SOTO can be driven outside the working area in manual mode. As the operator, you are responsible for ensuring the safety throughout the entire time SOTO is being operated with the controller. |
|---|
 | Notice! Risk of damage! The robot can be driven against obstacles that are not detected by the laser scanners in manual mode. Do not drive against obstacles. Always ensure that there is a sufficient distance upwards so that the top laser scanner is not damaged. |
|---|
Operating the robot manually with the controller
SOTO can be driven manually by switching the robot into manual mode.
Controller mounting position
SOTO can be operated using a handheld controller. The controller is stored in a bracket in the rear panel of the drive base.
How to use the controller
Control and move SOTO with the controller
| 1 | Change the operating mode of SOTO to manual:
|  |
| 2 | Select “Yes” to switch to Manual. ⚠️ If there are still active orders inside the backpack, please do not change the state and position of the load carriers. | 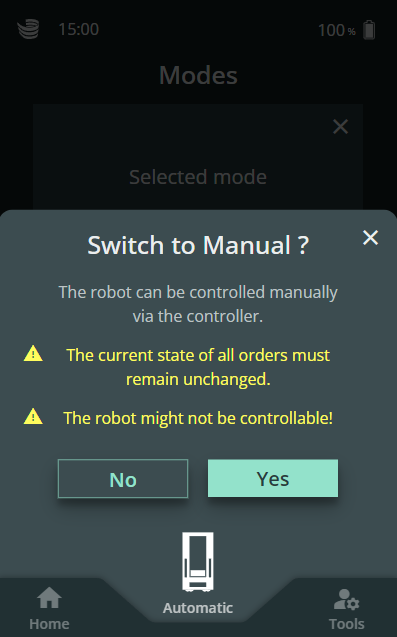 |
| 3 | Remove the controller from the holder. Notice! The Controller is located below the backpack. To avoid triggering the light curtain, please remove the controller from outside the backpack. | 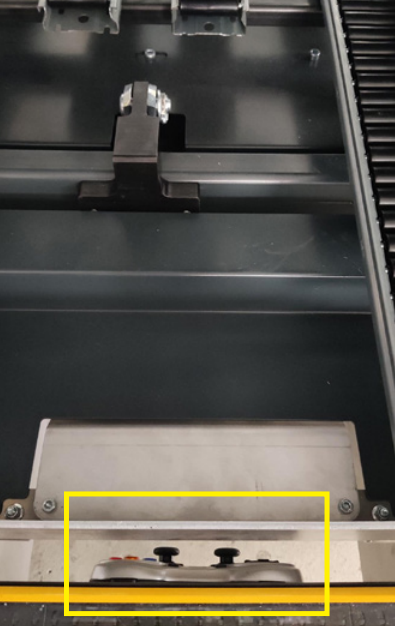 |
| 4 | The connection can now be initiated using the 'Start' button 2️⃣ on the controller. | 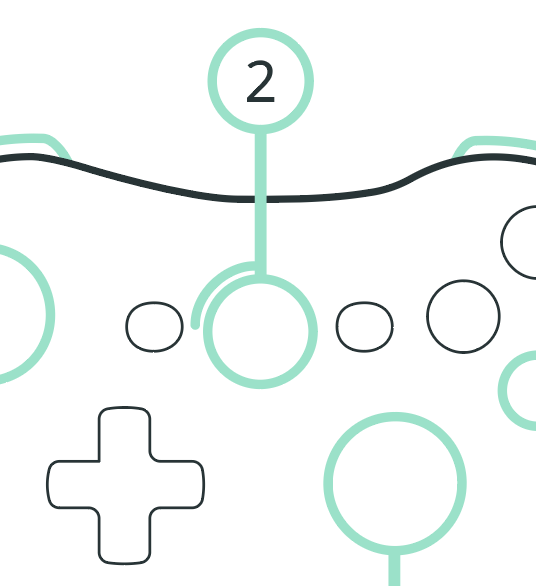 |
| 5 | If the connection was successful, a controller symbol will appear in the header of the SOTO display.
| .png?inst-v=f4298025-0332-4f6d-9973-f1558a9c6c26) |
| 6 | After maneuvering the robot to the required location, disconnect the controller and return it to its bracket. Upon returning the controller, make sure it securely snaps back into the bracket. Then, to resume normal operations, switch SOTO back into automatic mode. | 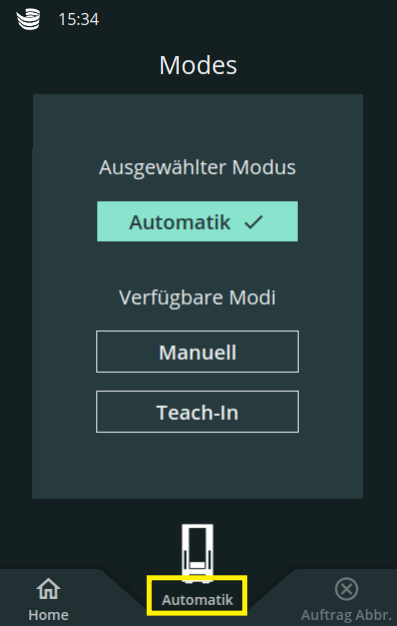 |
Do not forget to switch SOTO back to automatic mode.
How to use the controller — Buttons & Configurations
The robot can now be controlled by the handheld controller. Navigate the robot to its intended target position.
The default speed of the robot is set to 0.3 m/s.
Not all buttons on the controller are assigned.

Button | Function |
|---|---|
| Reduced speed: The robot reduces its speed to 0.05 m/s.
|
| ⚠️ Light indicates the successful connection. Press it once to start the controller. |
| Maximum speed: The robot accelerates to 1.5 m/s.
|
| Backpack control: Tilts the backpack to the front. |
| Backpack control: Tilts the backpack to the back. |
| Rotation control: Changes the orientation of the robot by rotating around its center. |
| Translation control: Moves the robot in X and Y direction without changing its orientation. |
Always use reduced speed when moving the robot close to obstacles that are not detected by the laser scanners — especially the charger.
The safety sensors remain active in manual mode. The robot automatically reduces its speed if the safety fields are violated by nearby obstacles. Keep in mind that the bottom laser scanners only detect obstacles at 0.12 m height.
Tips for better experience
Try to plug the USB dongle in an open port → if the port is inside the metal encasing, it can affect the signal strength.
Try to keep distance short and unblocked during robot control.
Make sure the battery on the controller is not near depletion. Low voltage on batteries increases lag quite a lot.
Troubleshoot
If you are in Manual mode, and the robot refuses to drive, go back to Automatic mode. Acknowledge the error (if there is one), let the motors home themselves. Then, go back to Manual mode to drive the robot. Please check the section above to have a comfortable driving experience.
Should anything be noticed or discovered during the work that is not described in these instructions, please contact MAGAZINO at http://support.magazino.eu.
Using the touch display
The display has multiple functions.
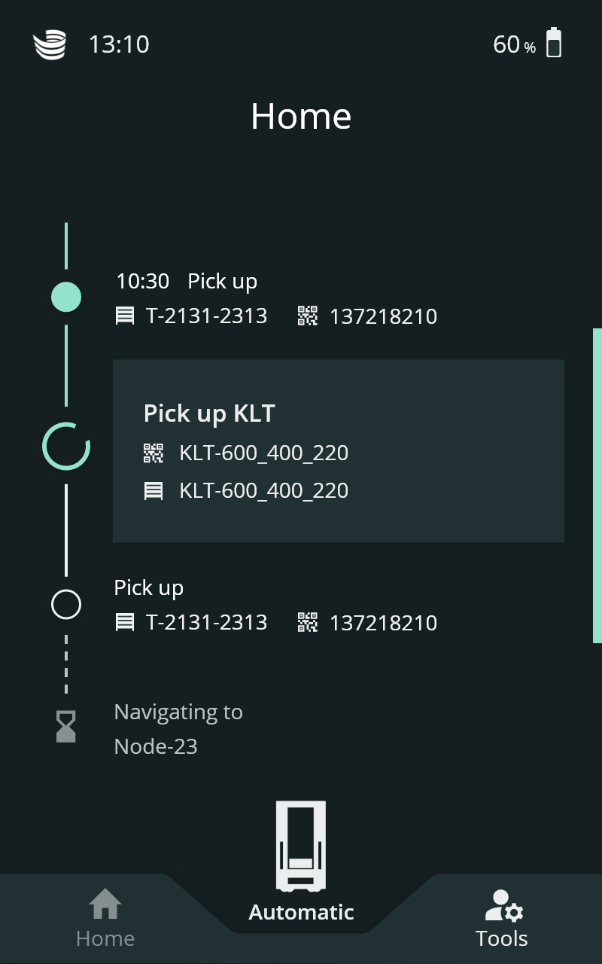
Information on the SOTO and its orders can be obtained in automatic mode.
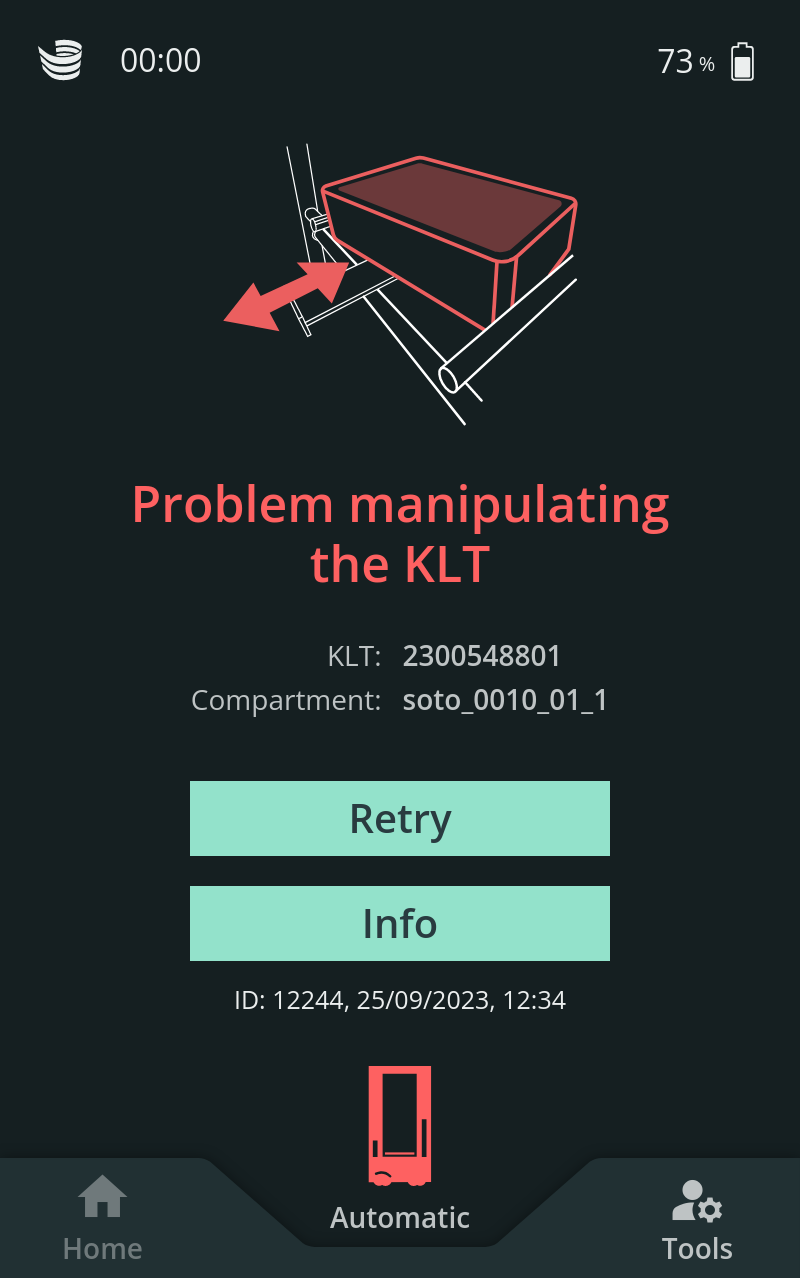
In the event of an intervention, the display shows instructions on how to rectify the fault.
The display can also be used to switch the robot to manual mode and from manual mode back to automatic mode.

Further information on the SOTO display can be found in the SOTO display interface documentation.
Use emergency stop button
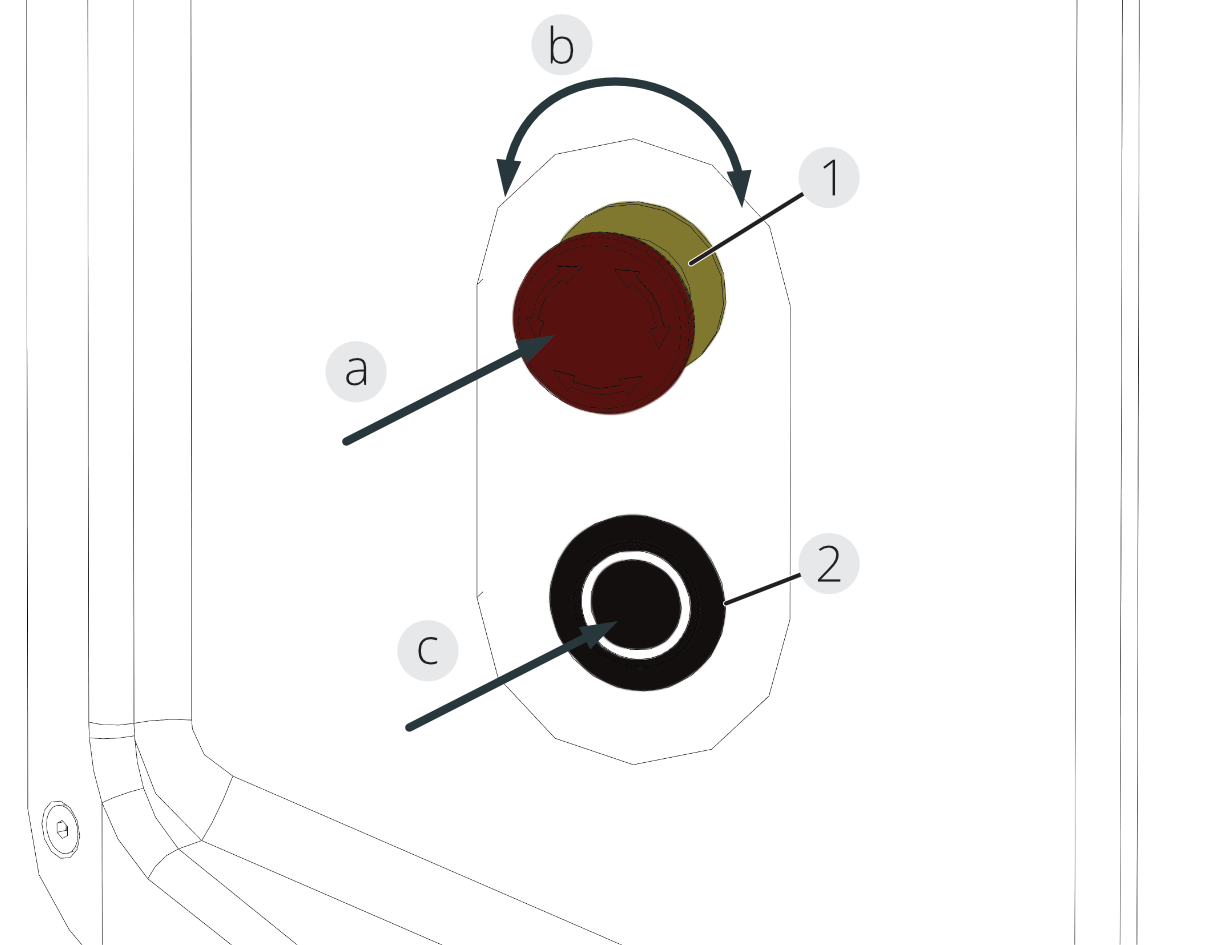
1) Emergency stop button, 2) Push button
The emergency stop buttons are used to prevent accidents and damage to the robot. Pressing an emergency stop button immediately stops all movements of the robot.
Press (a) the emergency stop button (1). The robot stops all dangerous movements. Unlock the emergency stop button to be able to put the robot back into operation. Turn (b) the emergency stop button in any direction until the button is unlocked. Press (c) the pushbutton (2) to put the robot back into operation.
Operation with jacking rollers
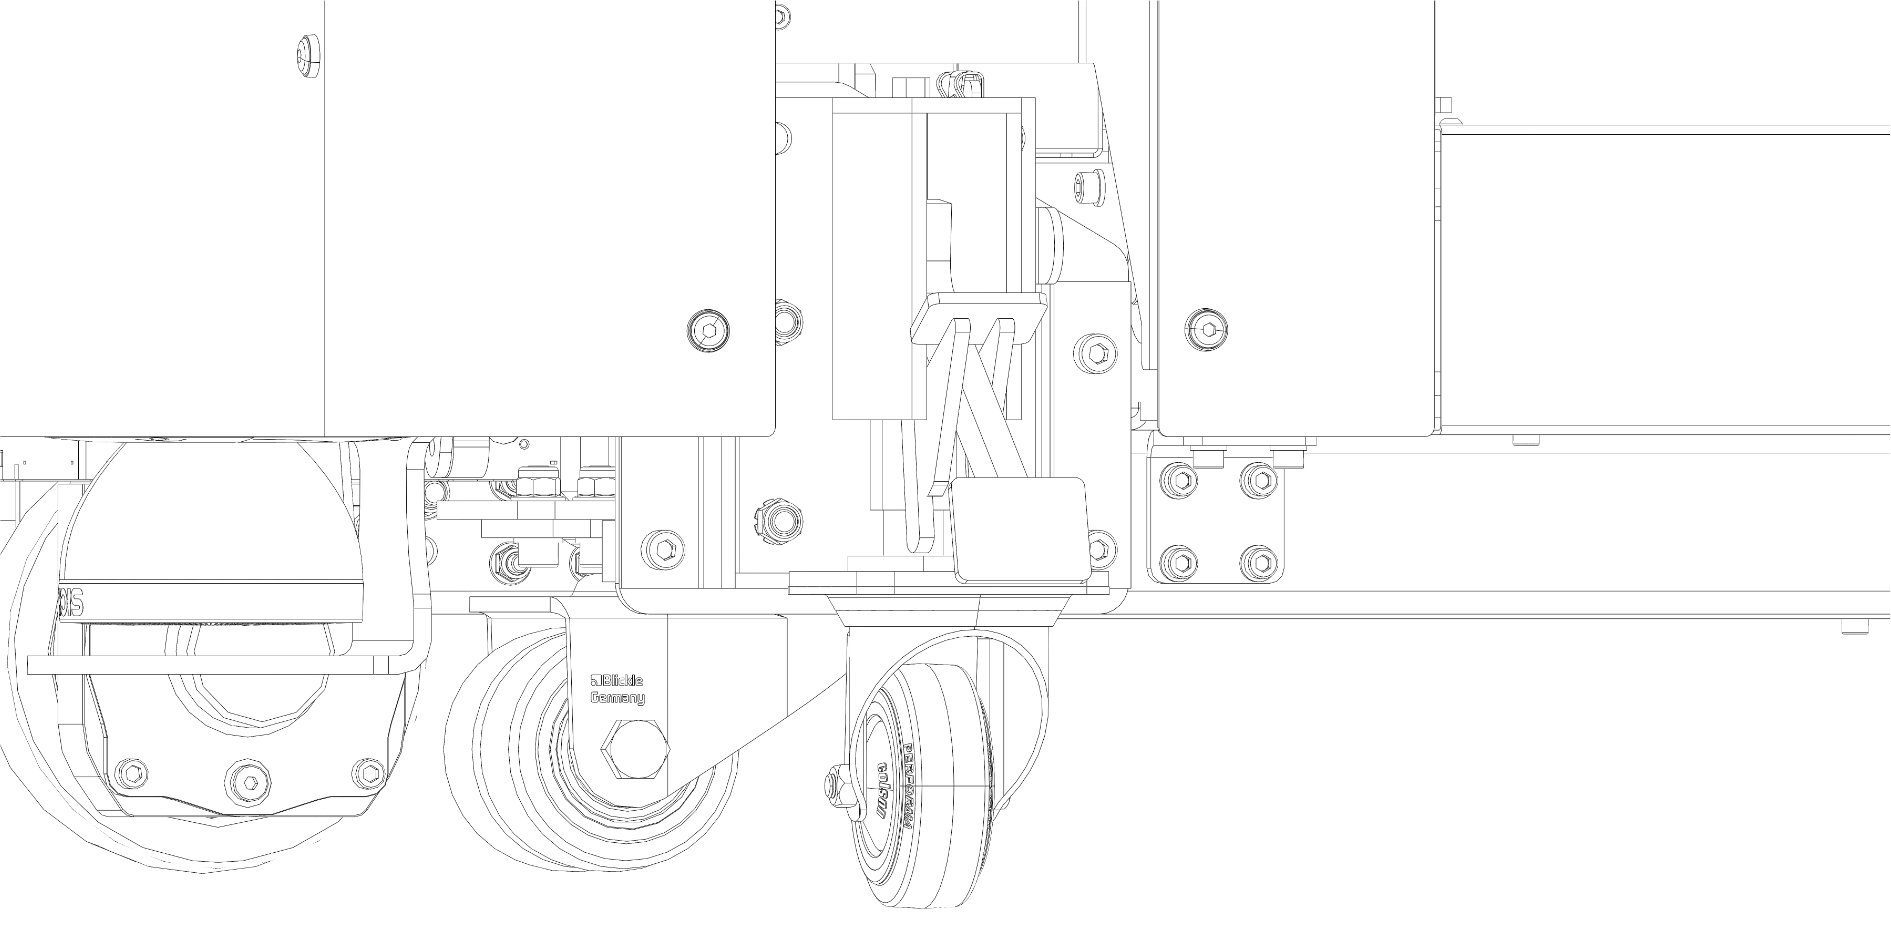
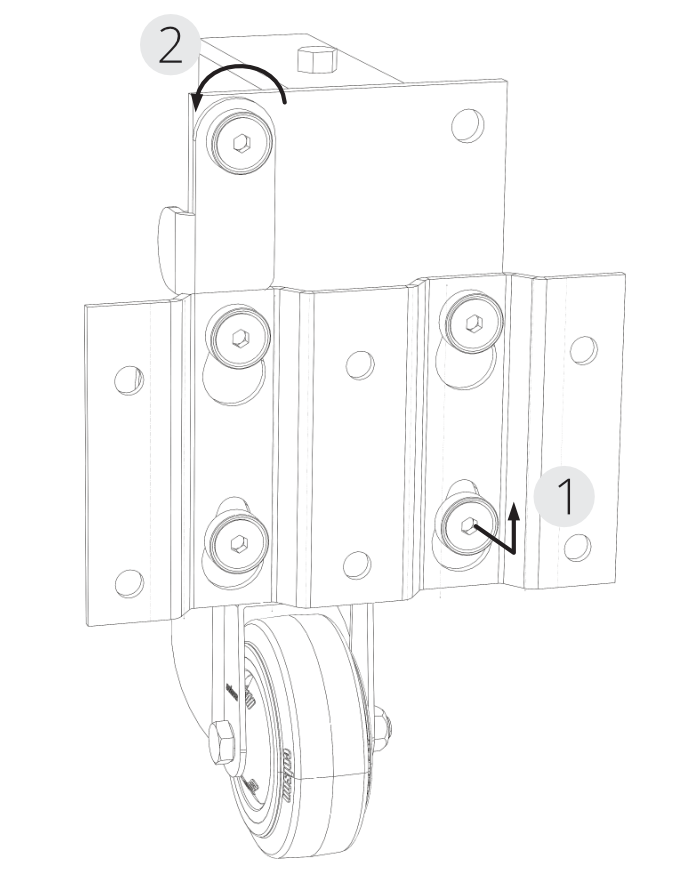
1) Guide, 2) Safeguard
The jacking rollers are hooked into a quick-release fastener (1) and held in position by the safeguard (2). When jacked up, the jacking roller is secured by the weight of the robot.
After all four jacking rollers have been mounted, the robot can be jacked up and pushed by pressing the pedal.
| Notice! Mounted jacking rollers injure the protective field of the robot. Dismantle all jacking rollers before starting up the robot. |
|---|
| Notice! The robot can be damaged if it is lowered quickly from the jacking rollers. Always lower the robot carefully and in a controlled manner. |
|---|