
Release 2025-01 (M34)
This release includes new features and improvements that make SOTO easier to use and more efficient.
SOTO
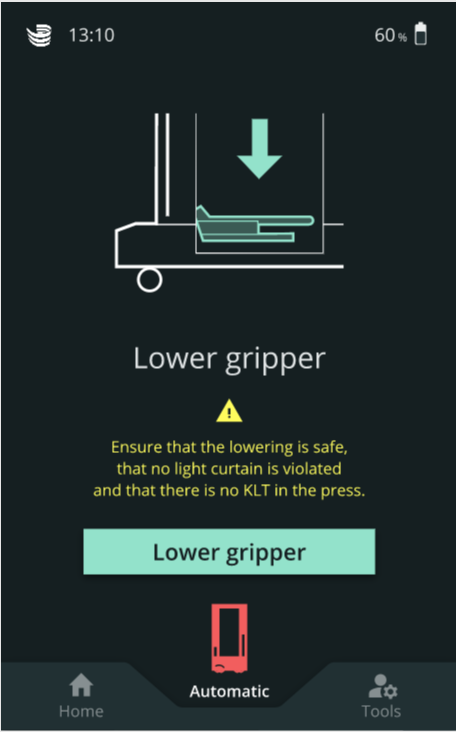
The tools section now includes the option to move the gripper to the lowest position. This is especially useful for ergonomic manual removal of KLTs from the KLT-press. On the SOTO display, navigate to 'Tools' and select 'Lower gripper'. The display will guide you through safely lowering the gripper.
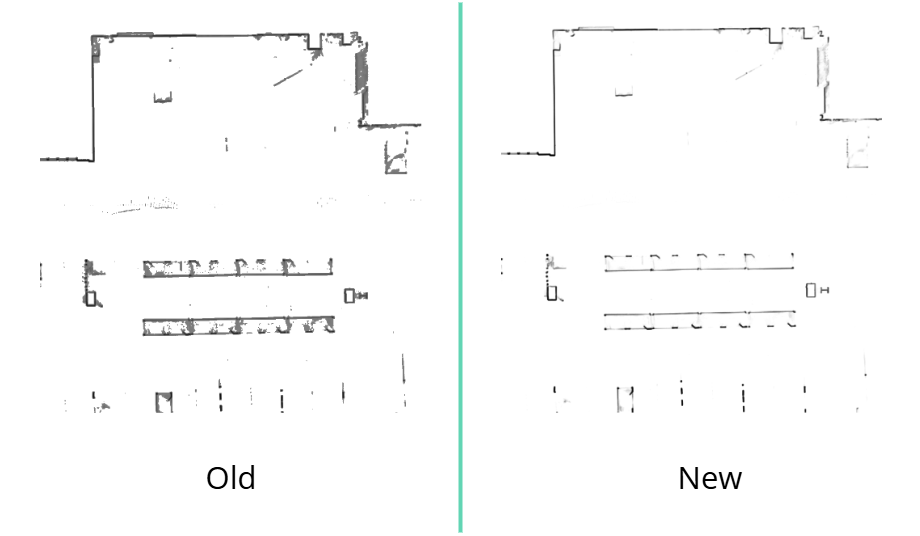
Laser maps shown on the SOTO display during environment recording are now more defined and clearer. The contours of shelves and obstacles are more clear, making it easier to identify relevant objects such as walls, pillars and docking shapes while mapping and modeling the environment. This also makes it easier to place handover stations in the Environment Editor.
Magazino Fleet Manager (MFM)
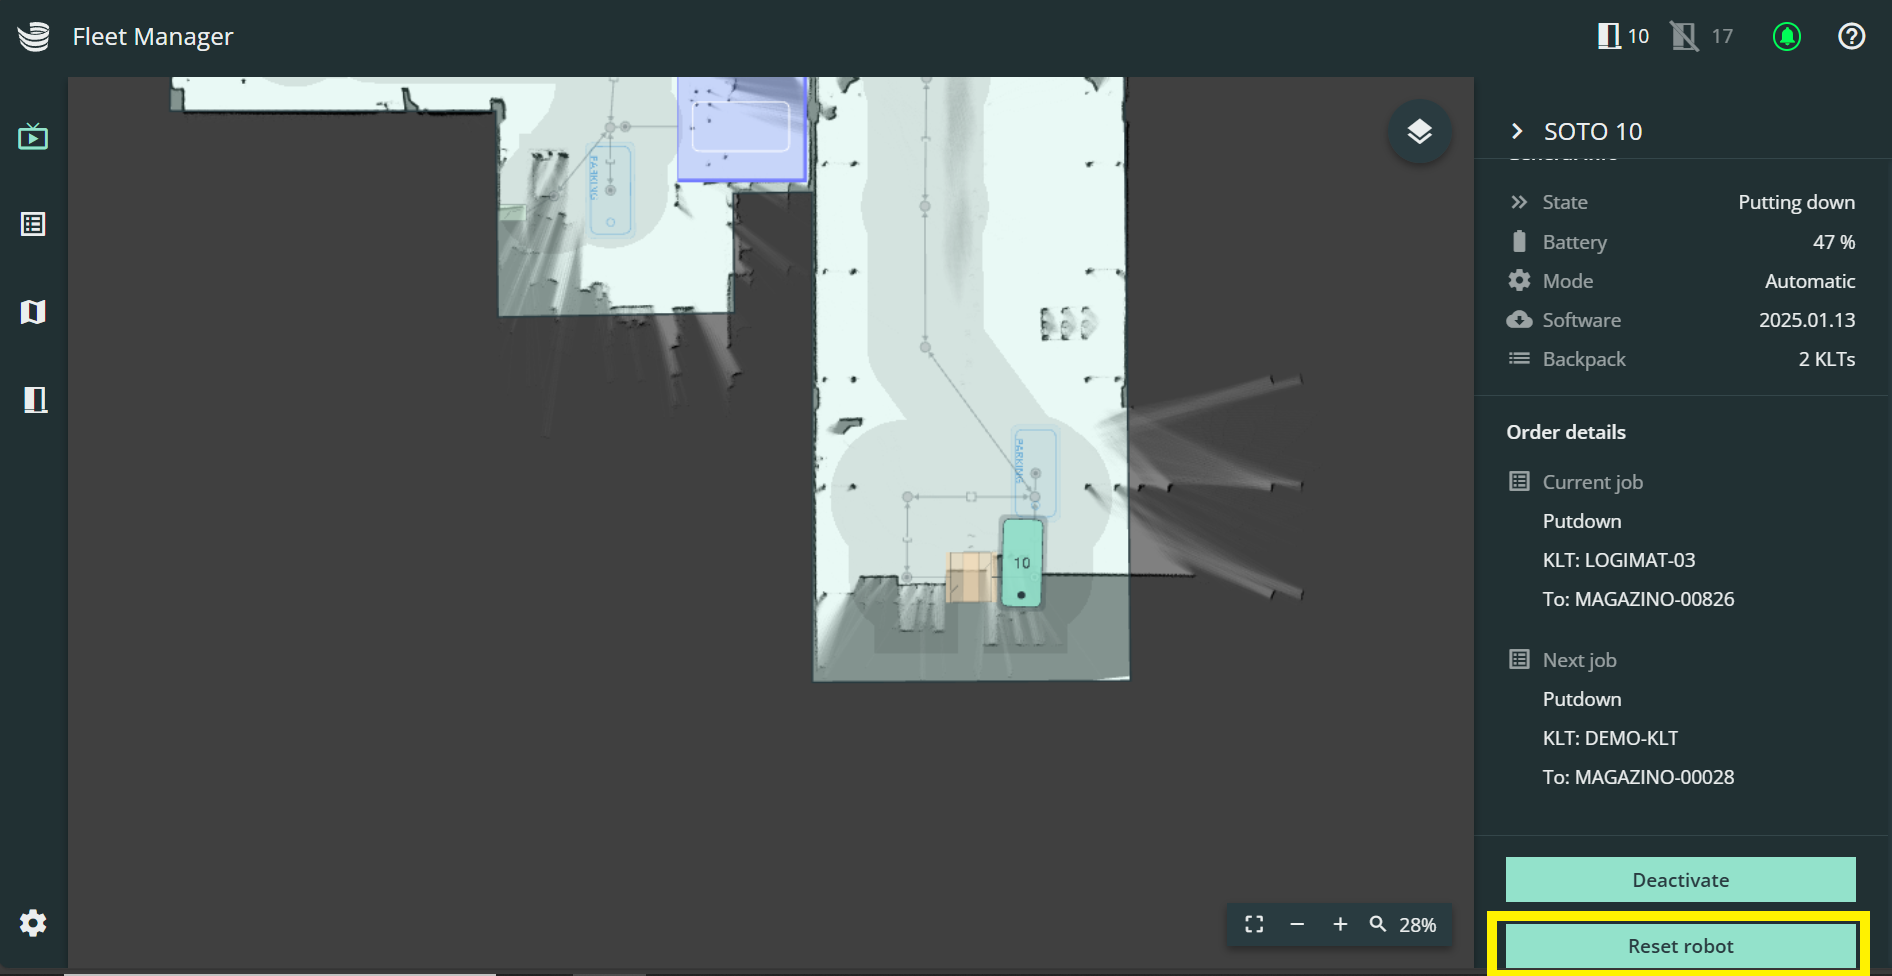
In the Live View, clicking 'Reset robot' will send the robot to the charging station for an automatic reset. Once it reaches the charger, it will be deactivated. The robot will then stop receiving orders from the master controller and will not accept new orders until manually reactivated in Magazino Fleet Manager (MFM).
Note: Resetting a robot takes it out of commission and clears its backpack (reverting to zero items). If the backpack contains any KLTs they need to be removed from the backpack as per the instructions of the tutorial. The transport orders linked to the KLTs in the backpack will be "aborted" in the WMS by default. Any further handling must be booked directly in the WMS user interface.
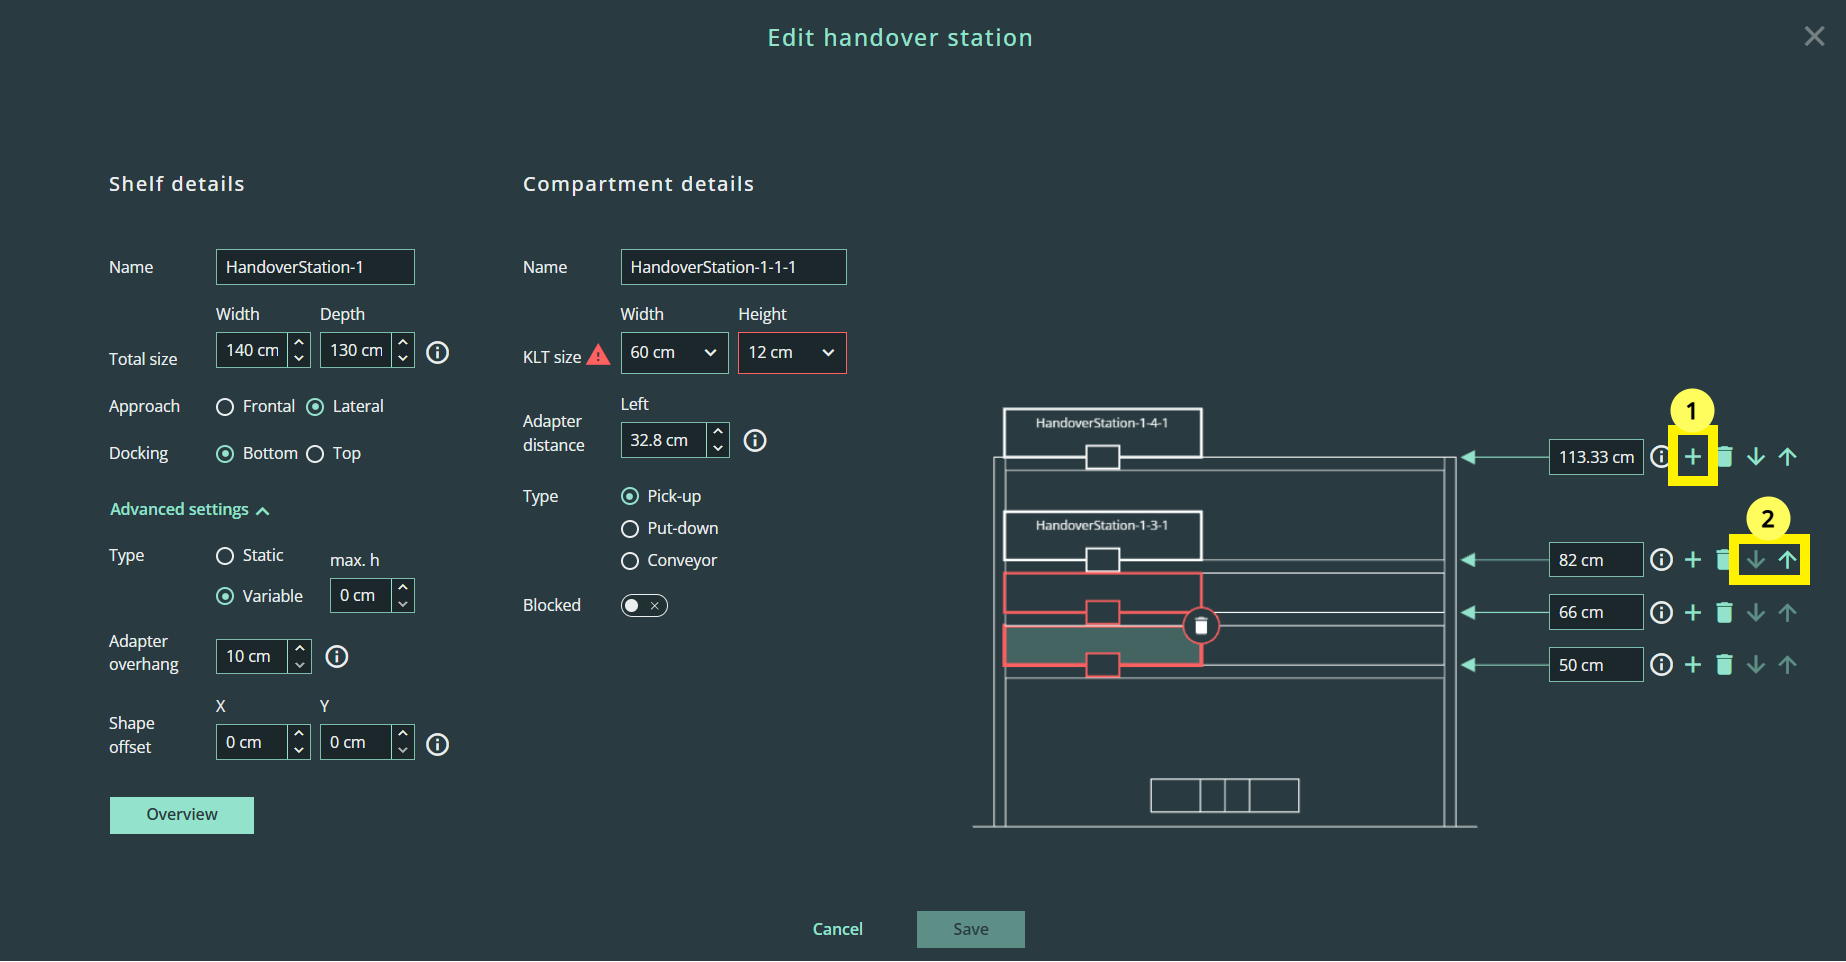
The menu for modelling handover stations has been simplified. You can now:
Add compartments by clicking on the plus symbol next to the layer height input field
Add shelf layers above or below each shelf layer by pressing the arrow symbol
View warning notifications if there is not enough space above the compartment
In the Environment Editor, you can move a parking space by clicking on the node and dragging it to the desired location.

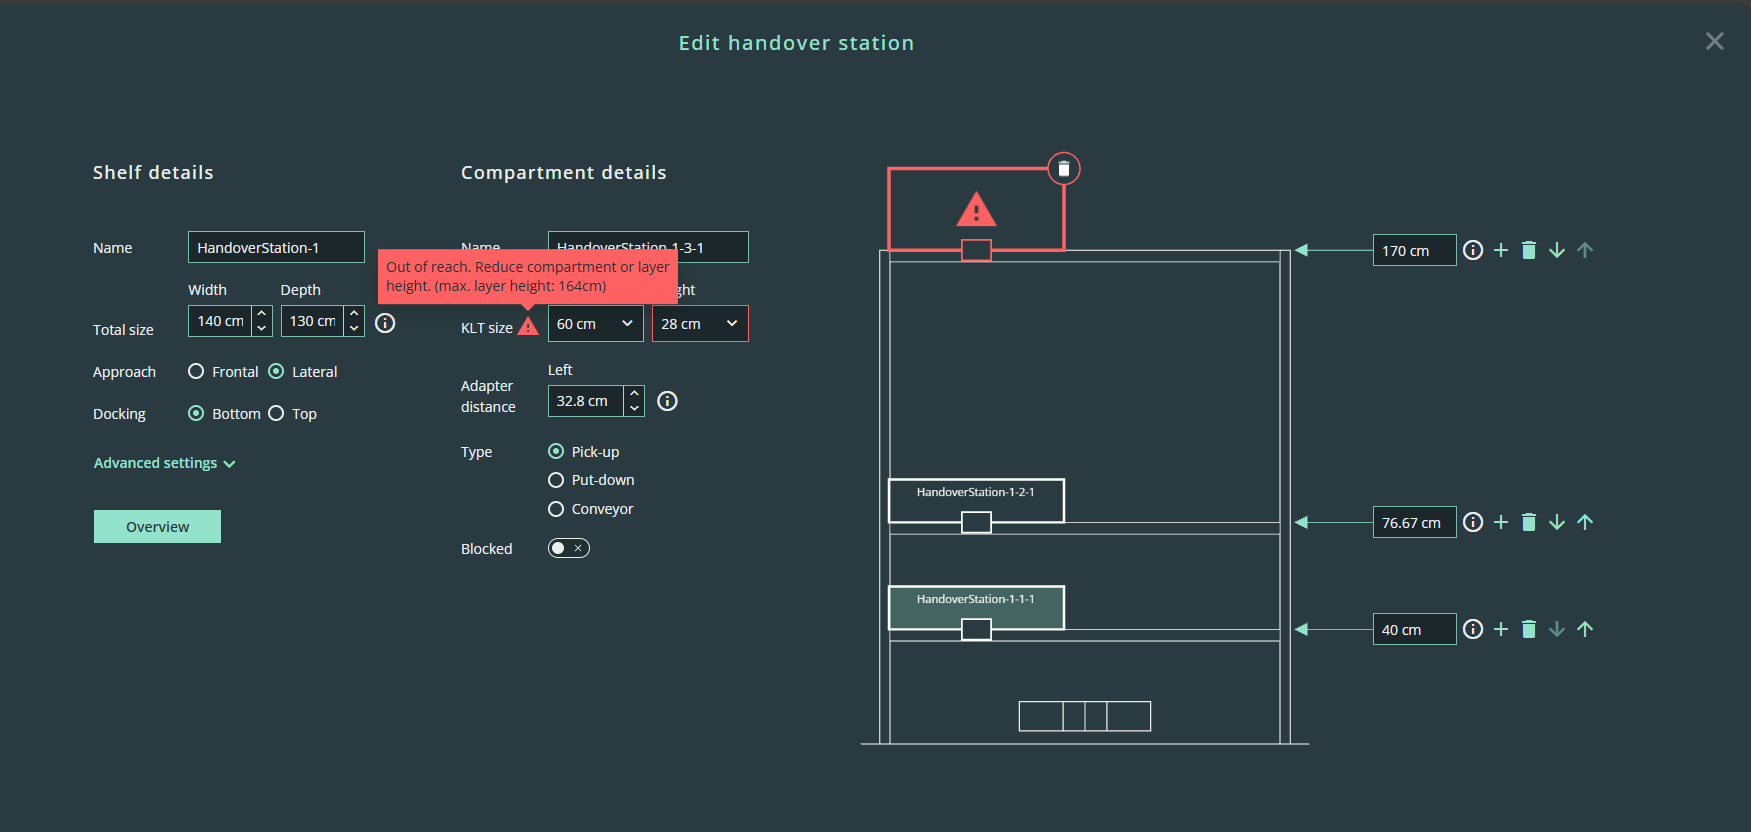
The Environment Editor now displays a warning message if a compartment's height exceeds the maximum permissible value. In this case, adjust the shelf layer height to ensure SOTO can safely pick the KLT.
SOTO's maximum handover height is 1700mm, assuming a KLT height of 220mm or less. See the 'Handover Solution' section in the datasheet for further guidance on handover heights.
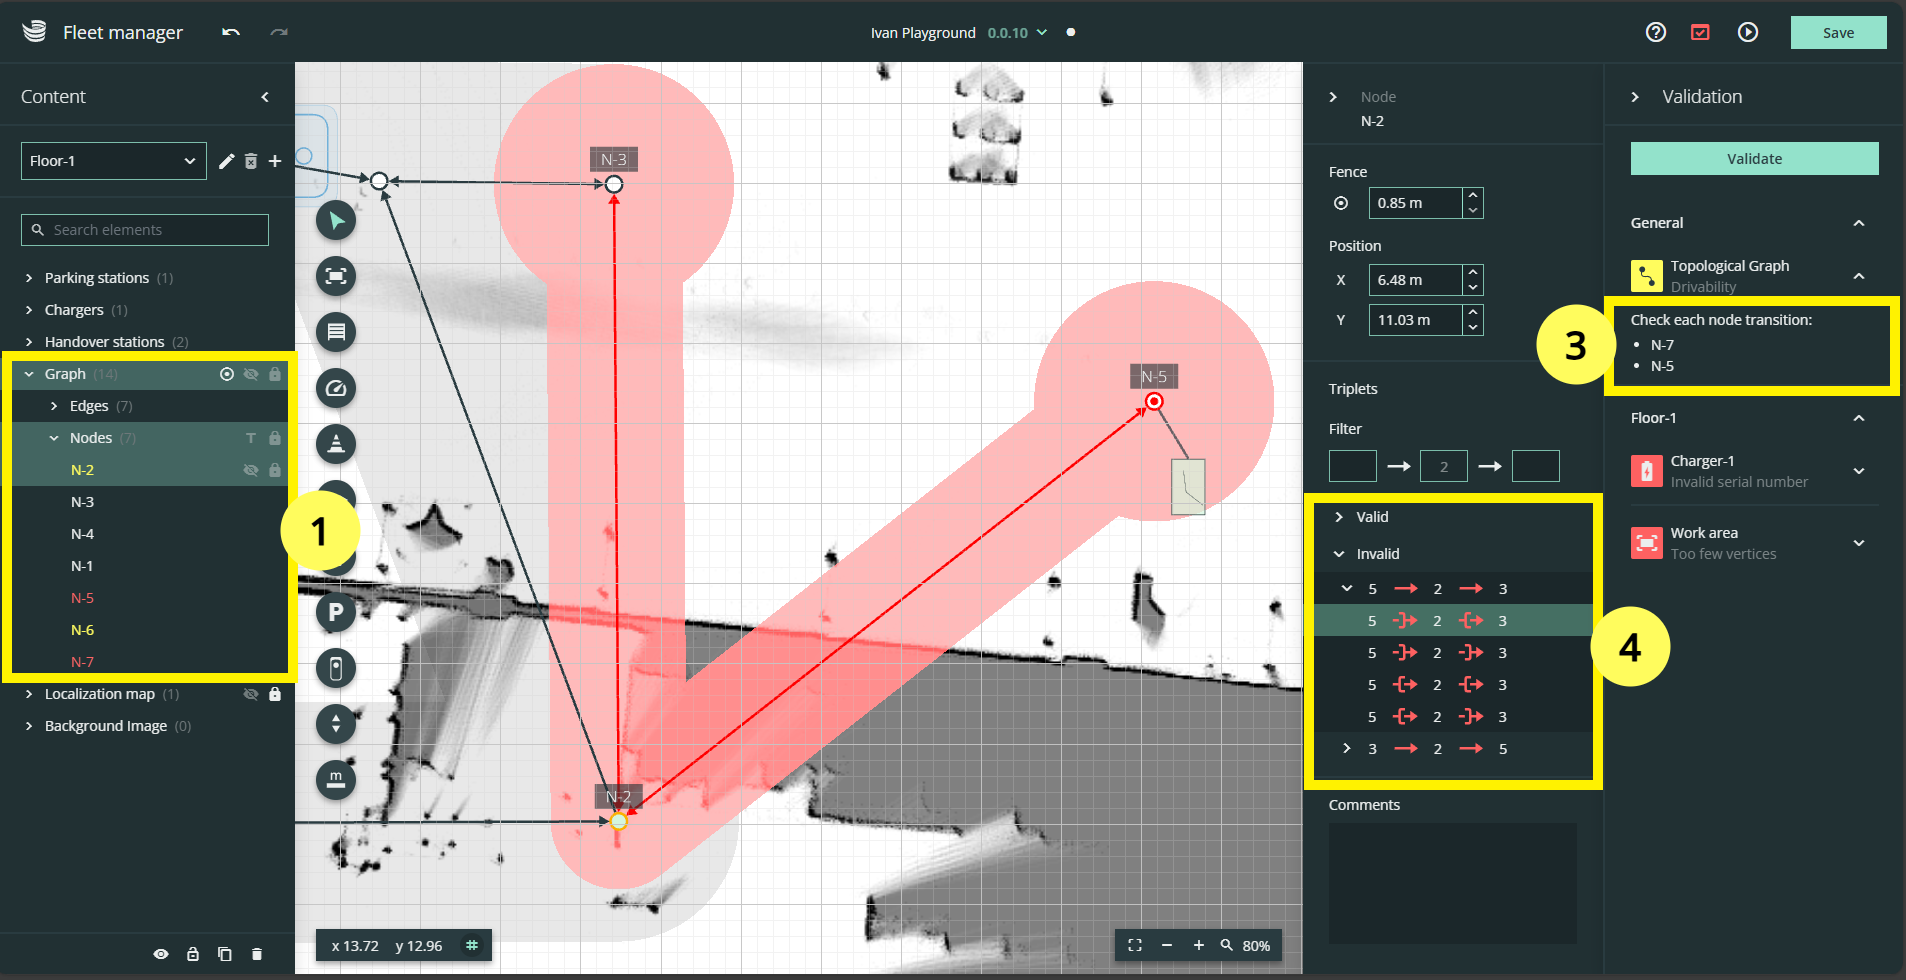
The Environment Editor now makes it simple to identify and fix invalid transitions. To check transitions, go to 'Graph' and select a node from the 'Nodes' dropdown.
Invalid nodes are displayed in red
Partially valid nodes (containing both valid and invalid transitions) are displayed in yellow
You can also jump to invalid nodes by selecting them in the validation panel
Transitions are found in the 'Triplets' section, grouped into valid and invalid categories
Optional: Use the filter input fields to narrow your search to specific transitions
This makes it simple to identify and correct invalid node transitions that were flagged during graph validation.
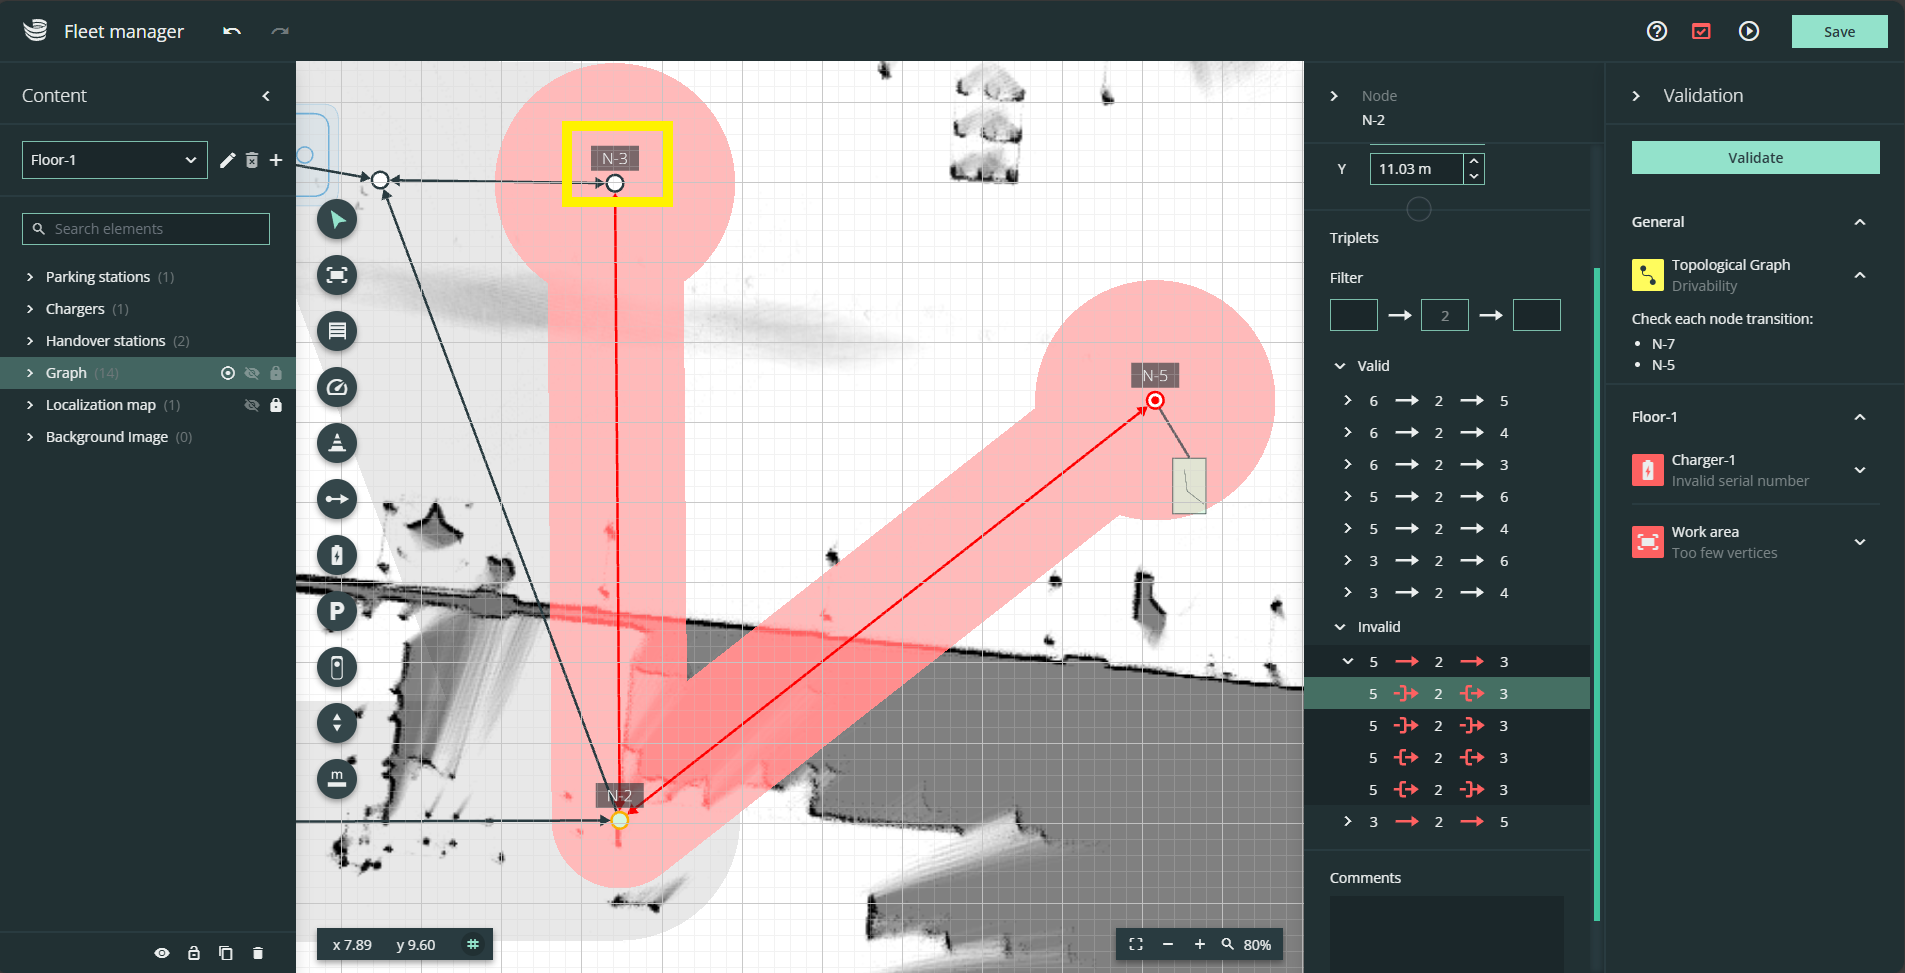
The node names are now displayed on the canvas of the Environment Editor when selecting an invalid transition. The node name is displayed above the node, and the affected edges and fences are highlighted in red. This makes it easier to identify and fix invalid transitions on the graph.
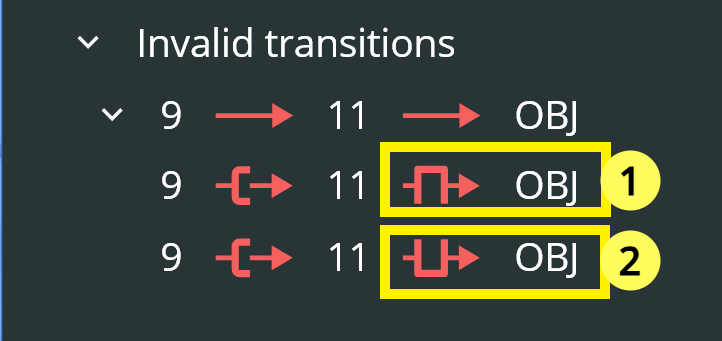
The Environment Editor now includes new icons that indicate the orientation in which the robot docks to an object. These icons appear in the 'Triplets' section and are always associated with an object node.
The orientation icons in the example diagram show:
Right side docking
Left side docking
Technical Specifications
This section provides detailed information about the technical specifications of SOTO. This information is intended for technical experts who need to understand the inner workings of SOTO to deploy, troubleshoot, or improve the performance of SOTO.