
This release includes new features and improvements that make SOTO easier to use and more efficient.
SOTO
Specific functions on the SOTO display are now password protected
To ensure security, certain actions on the SOTO display can only be carried out after entering a four-digit passcode. The following actions are password-protected:
-
Mode switch
-
Reset robot
-
Abort request
-
Complete manually
-
Switch off robot
SOTO follows the driving graph more closely
SOTO now prefers to navigate on the edge, closely adhering to the graph modeled in the Environment Editor. If an obstacle is present, SOTO still avoids the obstacle by navigating around it. After bypassing the obstacle, SOTO will maneuvre back towards the center of the edge for optimal alignment.
The SOTO display shows the MQTT connection status
The SOTO display now shows the connection status to the MQTT broker in the top right-hand corner. If the robot is not connected, the MQTT letters appear in red. If the connection is stable, no letters are displayed. The connection status is also displayed in the "Robot details" section of the display menu.
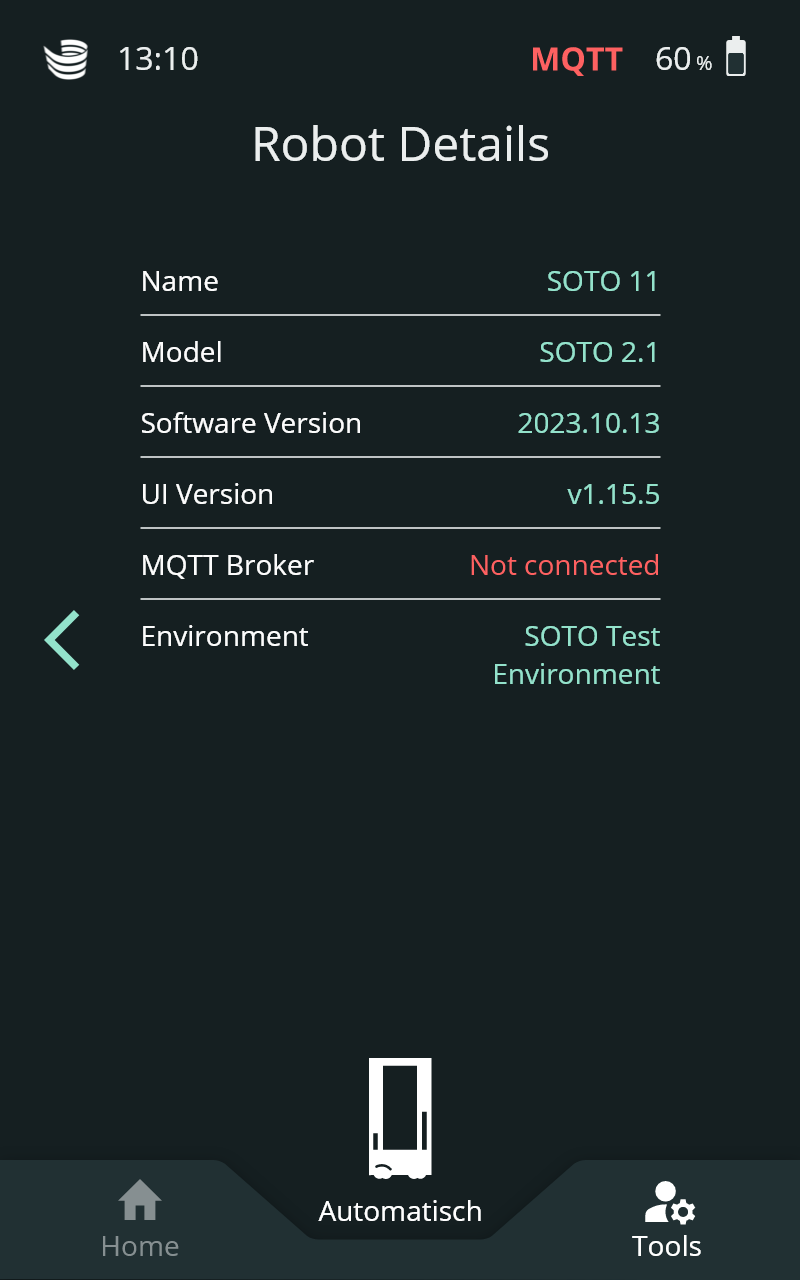
The reset button indicates SOTO's mobility status
The reset button now indicates the robot's ability to move. If the reset button is unlit, the robot cannot move. If the button is constantly lit, it means the robot is able to move.
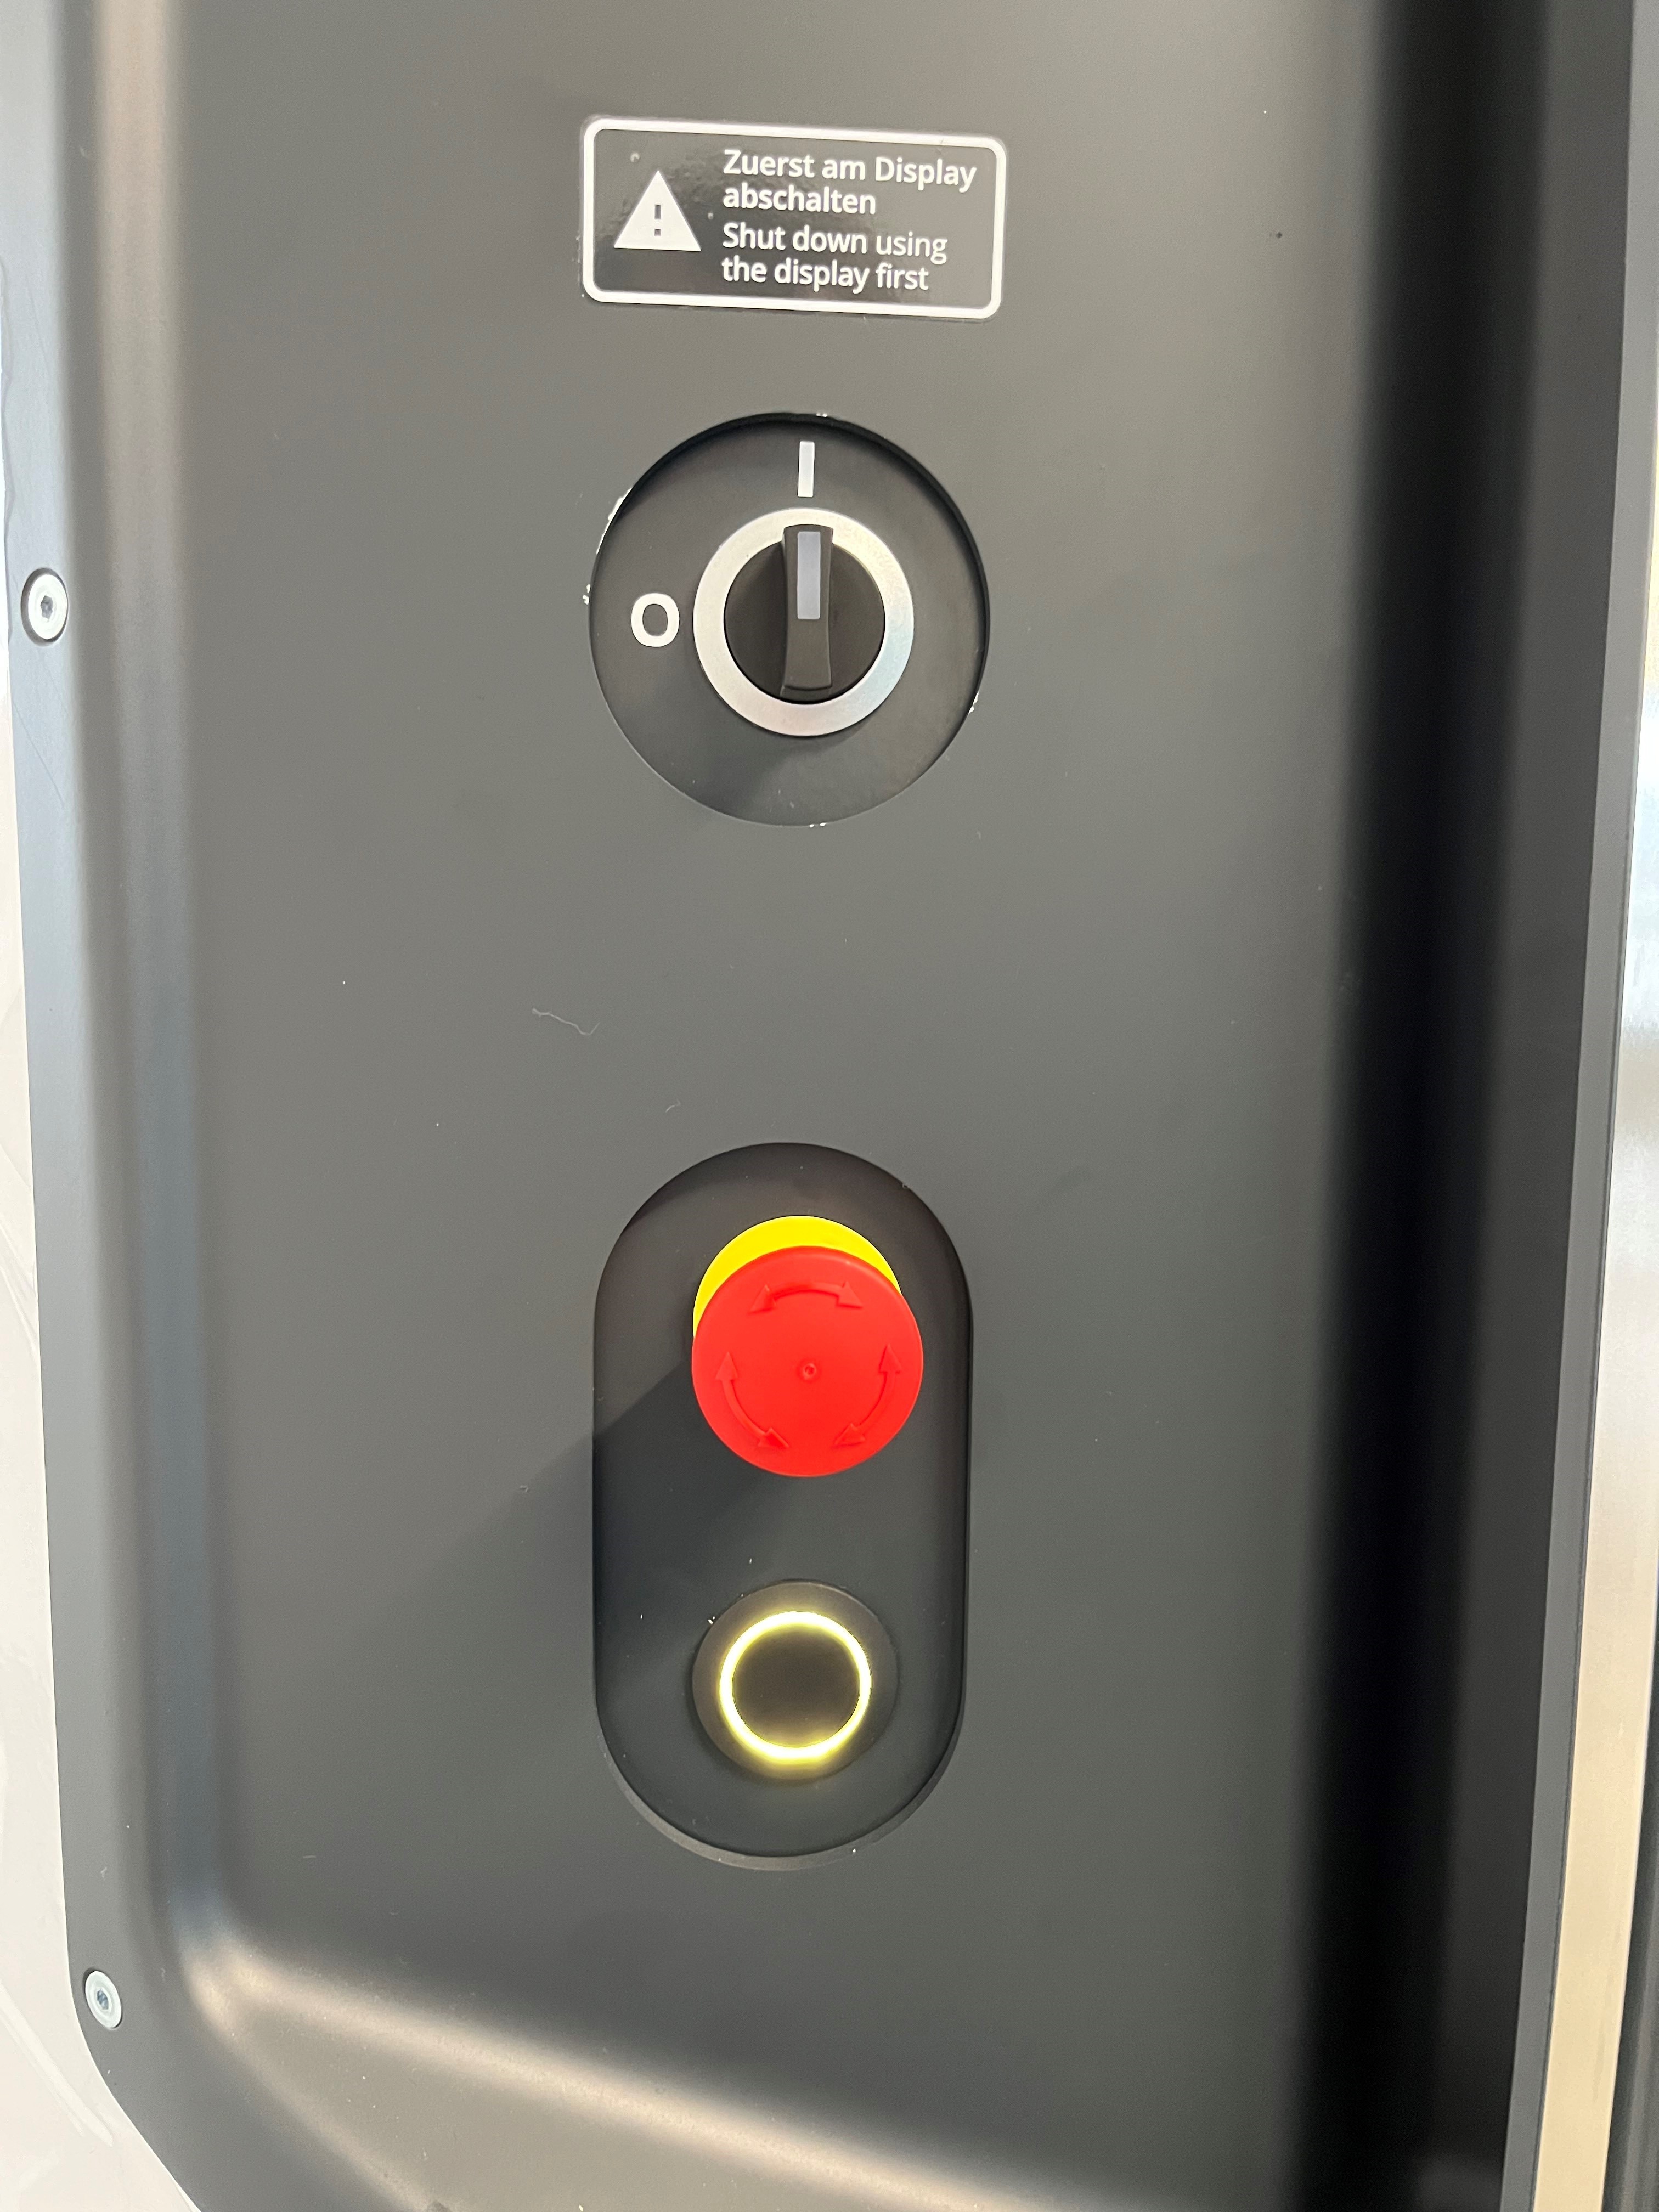
Improved floor-level object detection
SOTO has been upgraded to detect objects at a minimum height of 7cm from a flat surface, thereby increasing its safety in environments with low obstacles, such as forklift trucks.
Optimized KLT transfer to shelves
SOTO now transfers KLTs to shelves more efficiently. The robot begins at the top left compartment of a shelf and moves downwards, compartment by compartment. After completing a section, it moves to the next one and starts from the bottom, creating a pattern of movement that is similar to a horizontal "S". This method optimizes the time it takes to place KLTs on shelves and makes the transfer process more efficient.
Improved KLT positioning accuracy during shelf placement
SOTO now actively detects and corrects misaligned KLTs during shelf placement. Using box tracking technology, SOTO identifies any misalignment in the funnel and adjusts the box for proper placement. This improves accuracy and stability when handling KLTs.
Backpack collision prevention
SOTO is now better able to prevent collisions of KLTs with the backpack. If the box is misaligned on the gripper, the KLT press is used to reorient it, enhancing the accuracy and stability in KLT handling.
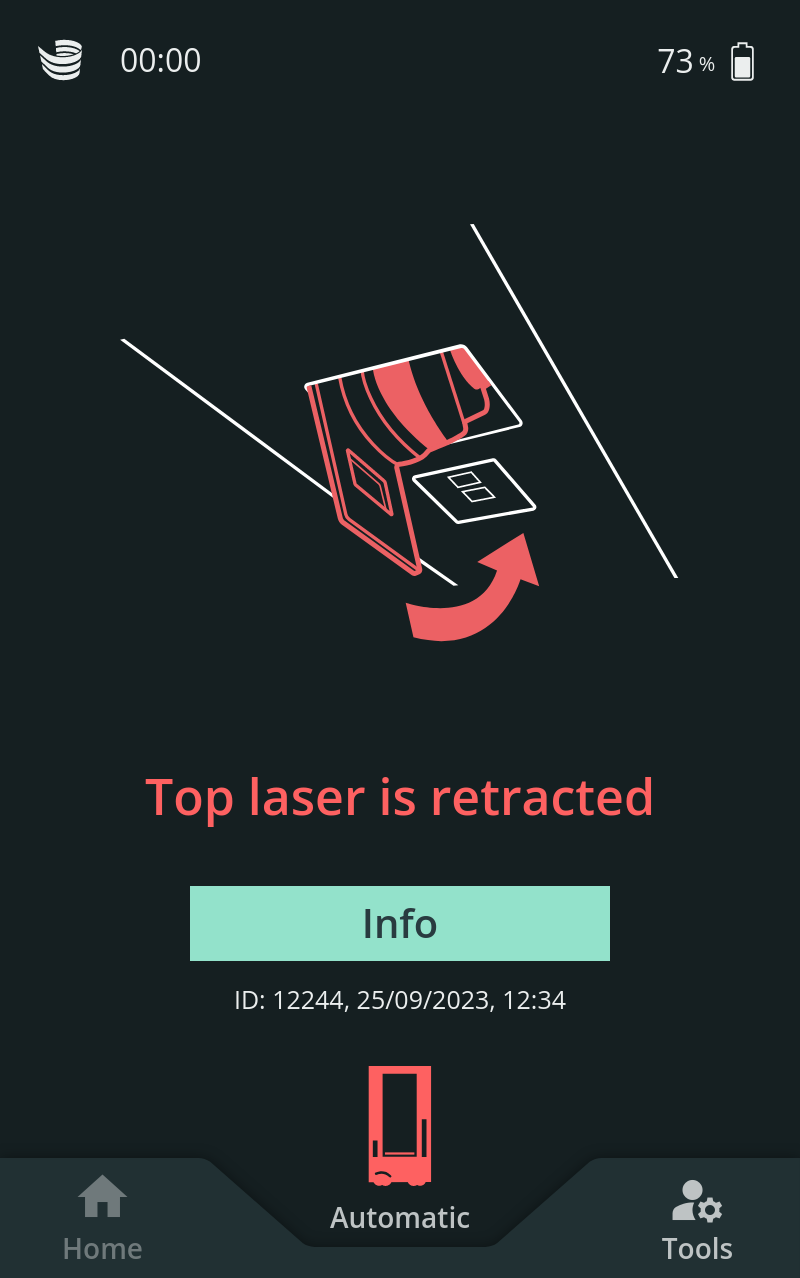
Pulled down laser scanner detection
The SOTO display now shows an error message when the upper laser scanner is retracted, indicating that the robot needs to be relocalized. If this occurs, the display provides detailed instructions on how to solve the problem.
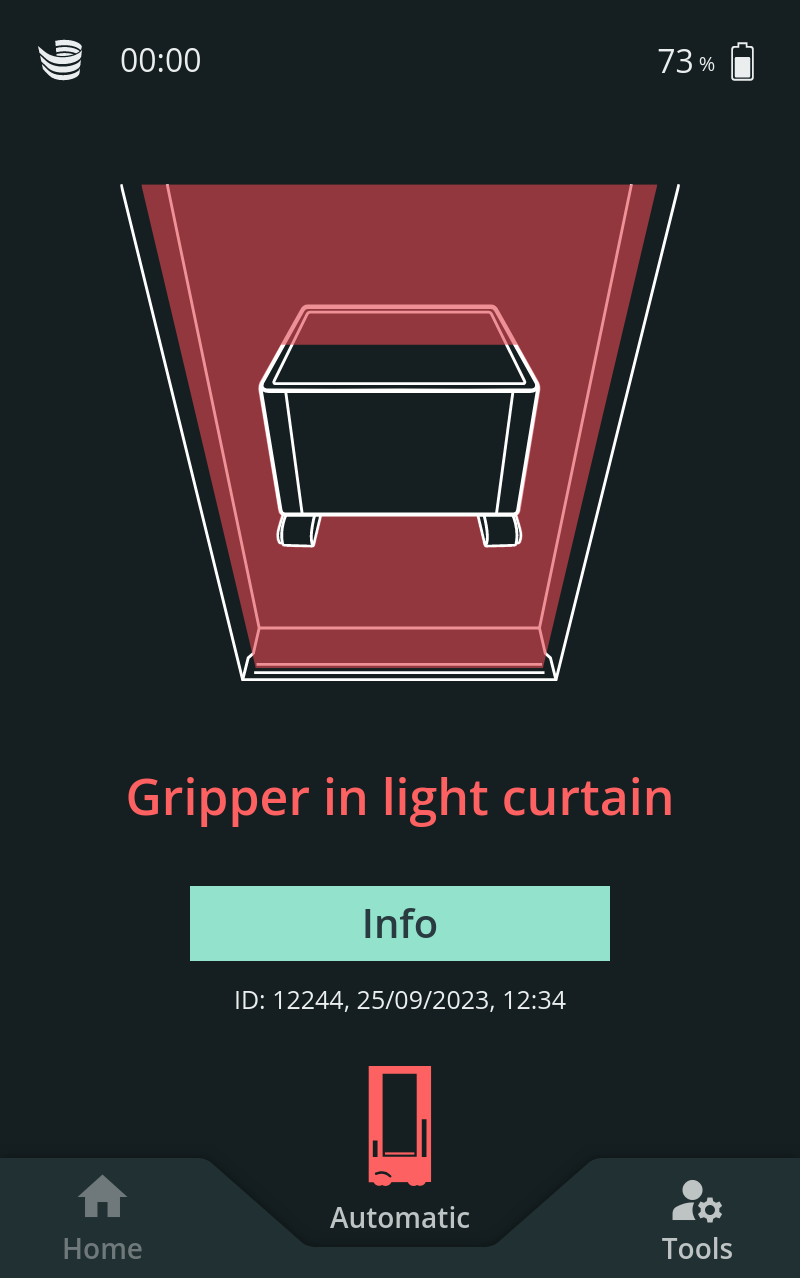
Tutorial for gripper violating light curtain
The SOTO display now shows an error message when the light curtain is violated by the gripper. If this occurs, detailed instructions are shown on the SOTO display to help rectify the problem.
Delocalization tutorial
The SOTO display now shows an error message when SOTO is delocalized. If this occurs, the display provides detailed instructions on how to re-localize the robot.
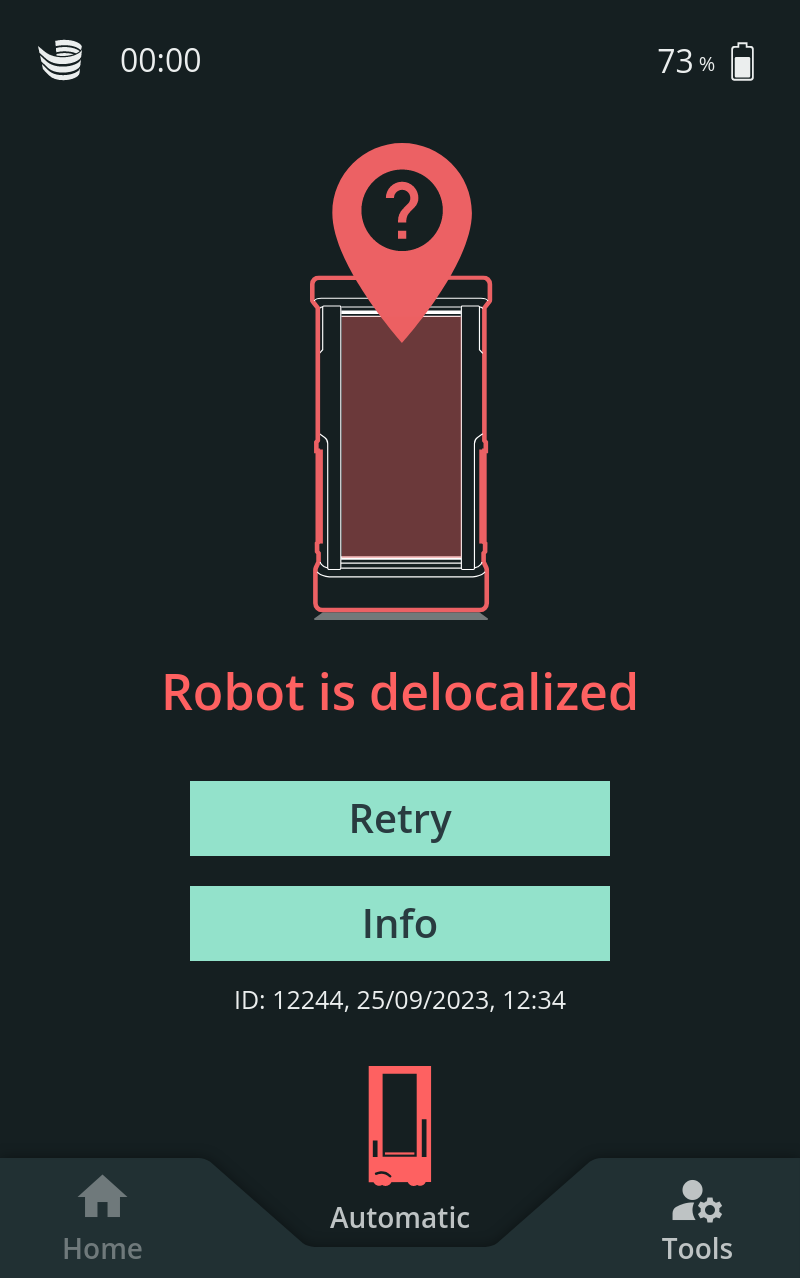
SOTO displays an error message when the robot cannot switch between operating modes
The SOTO display now shows an error message when the robot cannot switch between operating modes. If this occurs, the display provides a brief explanation of the problem that has occurred.
New “Clear Robot” concept
The SOTO display now provides an option to empty the robot of all KLTs and complete the orders manually. For detailed instructions, please consult the documentation section.
Note: This option should only be used when absolutely necessary.
Magazino Fleet Manager (MFM)
Control whether SOTO drives around obstacles on the left or right-hand side
Fences can now be made larger or smaller on one side in the Environment Editor. This determines the robot’s navigation path around objects, favouring either left or right:
-
When an edge is selected, a settings panel opens with input options for “Field A” and “Field B”, corresponding to the left and right side of the edge on the map.
-
The fence can be made larger or smaller on either side.
View the status of each robot in Live View
Clicking on a robot in the Live View opens a side panel with detailed information about the robot's status. This panel includes:
-
The robot's software version.
-
The number of KLTs on board.
-
The current job in progress.
-
A button to activate or deactivate the robot.
In the case of a fire alarm, a red fire icon appears next to the robot. Once the alarm is cleared, the icon turns grey, signaling that the robot must be manually reactivated.
Duplicate environments in the Environment Editor
In the Environment Editor, it is now possible to duplicate environments. This can be done by clicking on the three-dot menu next to each environment in the list and selecting "duplicate".
New shelf creation menu in the Environment Editor
The Environment Editor now offers more precise and customizable handover station creation. Key features include:
-
Easy shelf identification with naming options.
-
Adjustable width and height for shelves and KLTs.
-
Diverse docking choices, including frontal or lateral with different docking shapes.
-
Advanced settings to define the type of handover station.
Shelves are also editable in Live View, enabling quick adjustments. For further information, please consult the documentation section.
24-hour order history feed
The Order Overview section now displays orders from the last 24 hours. Additionally, users can filter between completed, aborted and cancelled orders in the dropdown menu next to "Selected requests".
Warning notifications in Live View
The Live View now includes warning notifications. If a warning occurs, the robot icon will turn yellow. Clicking on the robot displays the warning message in the right-hand panel.
Technical Specifications
This section provides detailed information about the technical specifications of SOTO. This information is intended for technical experts who need to understand the inner workings of SOTO to deploy, troubleshoot, or improve the performance of SOTO.
Automatic E1 error recovery
SOTO is now able to automatically recover from E1 laser scanner errors.
Time range arguments in MagCLI
The "display stats task_phases" command in MagCLI now supports a time range argument. This allows for the retrieval of task phase timings for specific periods, aiding in performance analysis and improvements.
Useful scenarios include:
-
Displaying data since a specific day (e.g.,
display stats task_phases -s 2023,06,01for data since June 1, 2023). -
Displaying data since a specific time on a day (e.g.,
display stats task_phases -s 2023,06,01,12for data since 12 PM on June 1, 2023). -
Displaying data up to a specific day (e.g.,
display stats task_phases -e 2023,06,01for data up to June 1, 2023). -
Displaying data up to a specific time on a day (e.g.,
display stats task_phases -e 2023,06,01,12for data up to 12 PM on June 1, 2023). -
Specifying a complete time range (e.g.,
display stats task_phases -s 2023,06,01,08 -e 2023,06,03,16for data from 8 AM on June 1 to 4 PM on June 3, 2023).
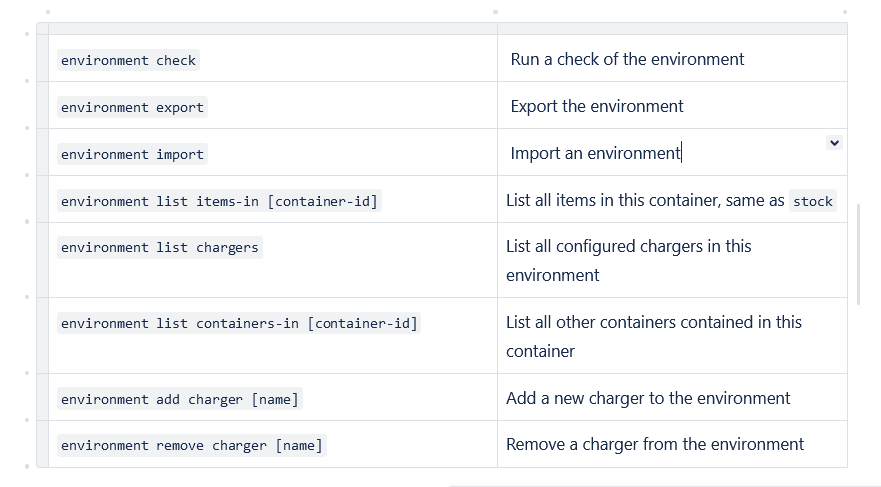
New commands to implement an environment in MagCLI
New MagCLI commands have been added for enhanced management of the robot's environment. The following table provides a concise overview of each command and its specific function, allowing operators to make quick environmental adjustments.
New commands to display firmware and hardware versions in MagCLI
To assist in monitoring and troubleshooting the robot's system, two commands have been added for detailed hardware and firmware version tracking:
hardware show versions Displays the robot's components hardware versions, as recorded in the ROS parameters.
hardware show fw-versions Lists all firmware and hardware versions of each CAN Bus participant.
Detailed exception reports in MagCLI
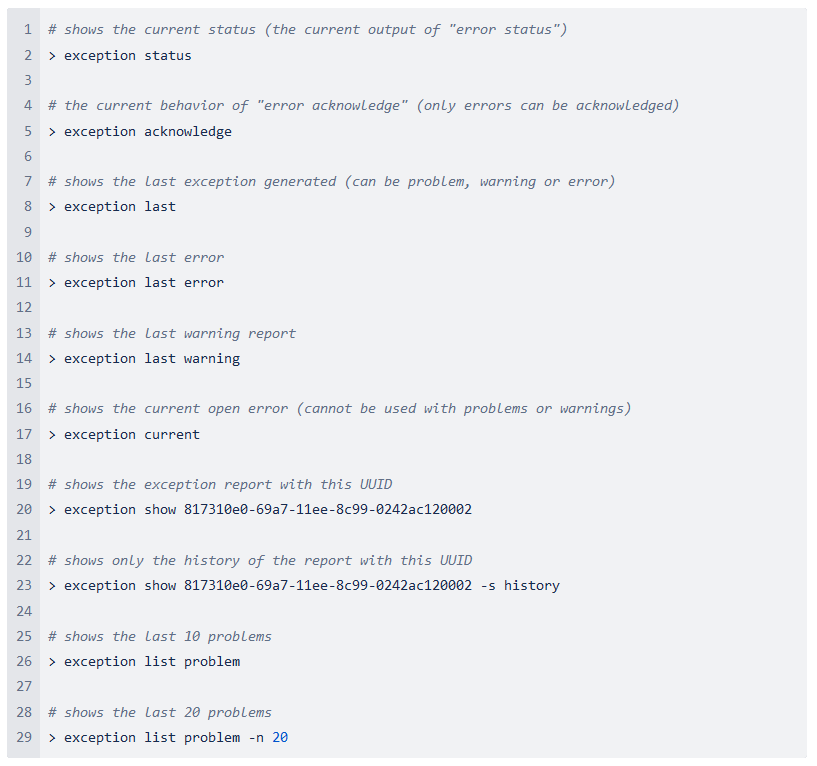
MagCLI now includes new scripts for detailed analysis of exceptions. A complete list of related commands is available in the MagCLI dropdown menu.
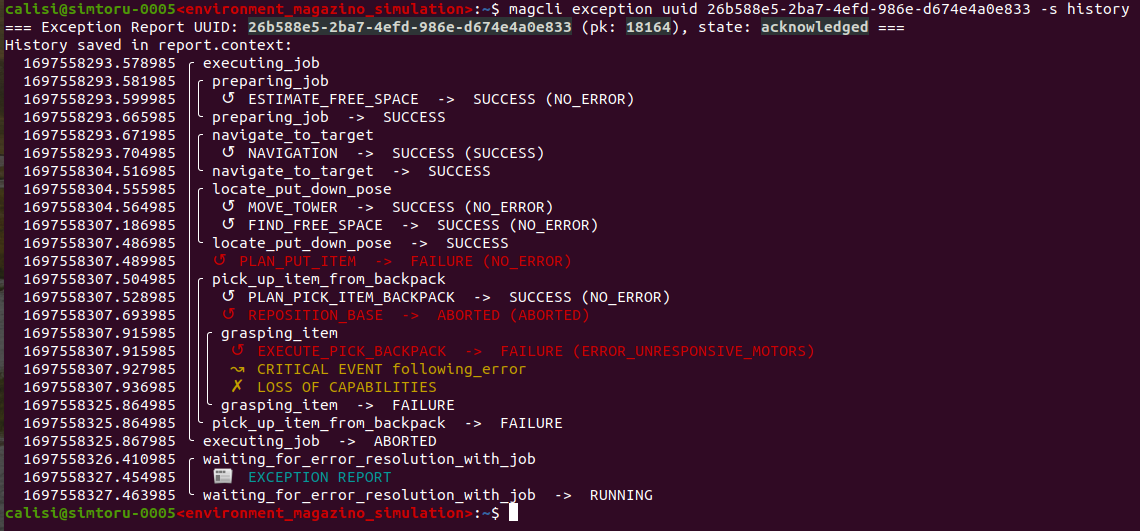
To analyze a specific error, follow these steps:
-
Find the UUID of the last error using the command
exception lastorexception listfor a full list of recent exceptions. -
Note the UUID.
-
Enter $ magcli exception [uuid] -s history to view the robot's activities leading up to the error
Take screenshot of SOTO display
It is now possible to take a screenshot of the SOTO display by entering the following command into MagCLI and following the instructions: magcli take-picture screen
The image is saved on SOTO's internal drive (the file path is printed by the tool) and can be transferred to the user's computer via ssh. The file needs to be transferred in order to view the image.